前言
最近为一个公众号h5商城接入了微信支付功能,查找资料过程中踩了很多坑,以此文章记录一下和大家分享
前期准备
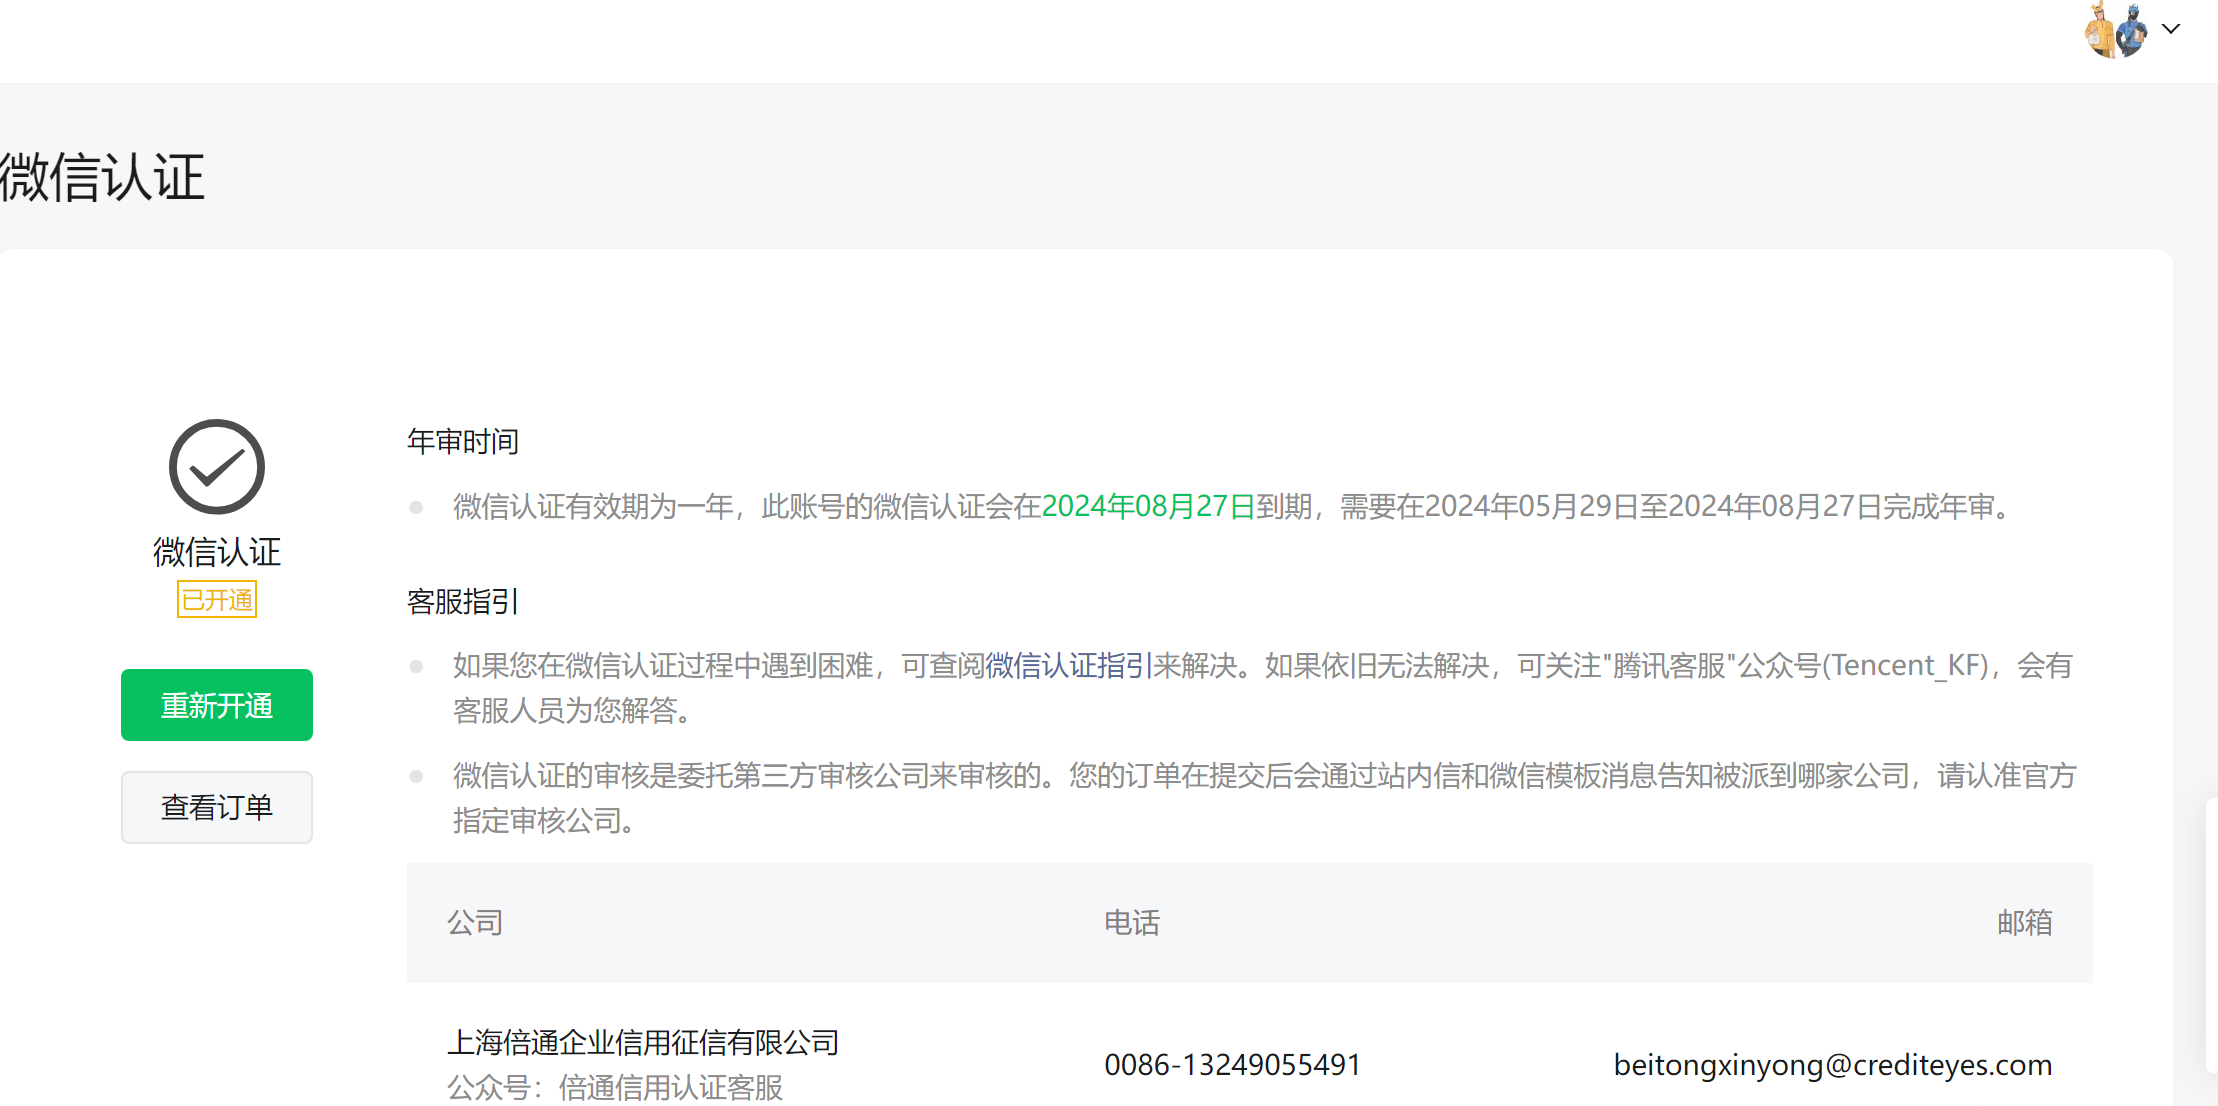
公众号认证
微信支付功能需要开通企业号并进行资质认证,费用一年300,且需企业营业执照等信息,对公账户打款验证
登录微信公众平台https://mp.weixin.qq.com/,创建服务号
如果已有服务号扫码登录后点击公众号头像选择认证详情菜单
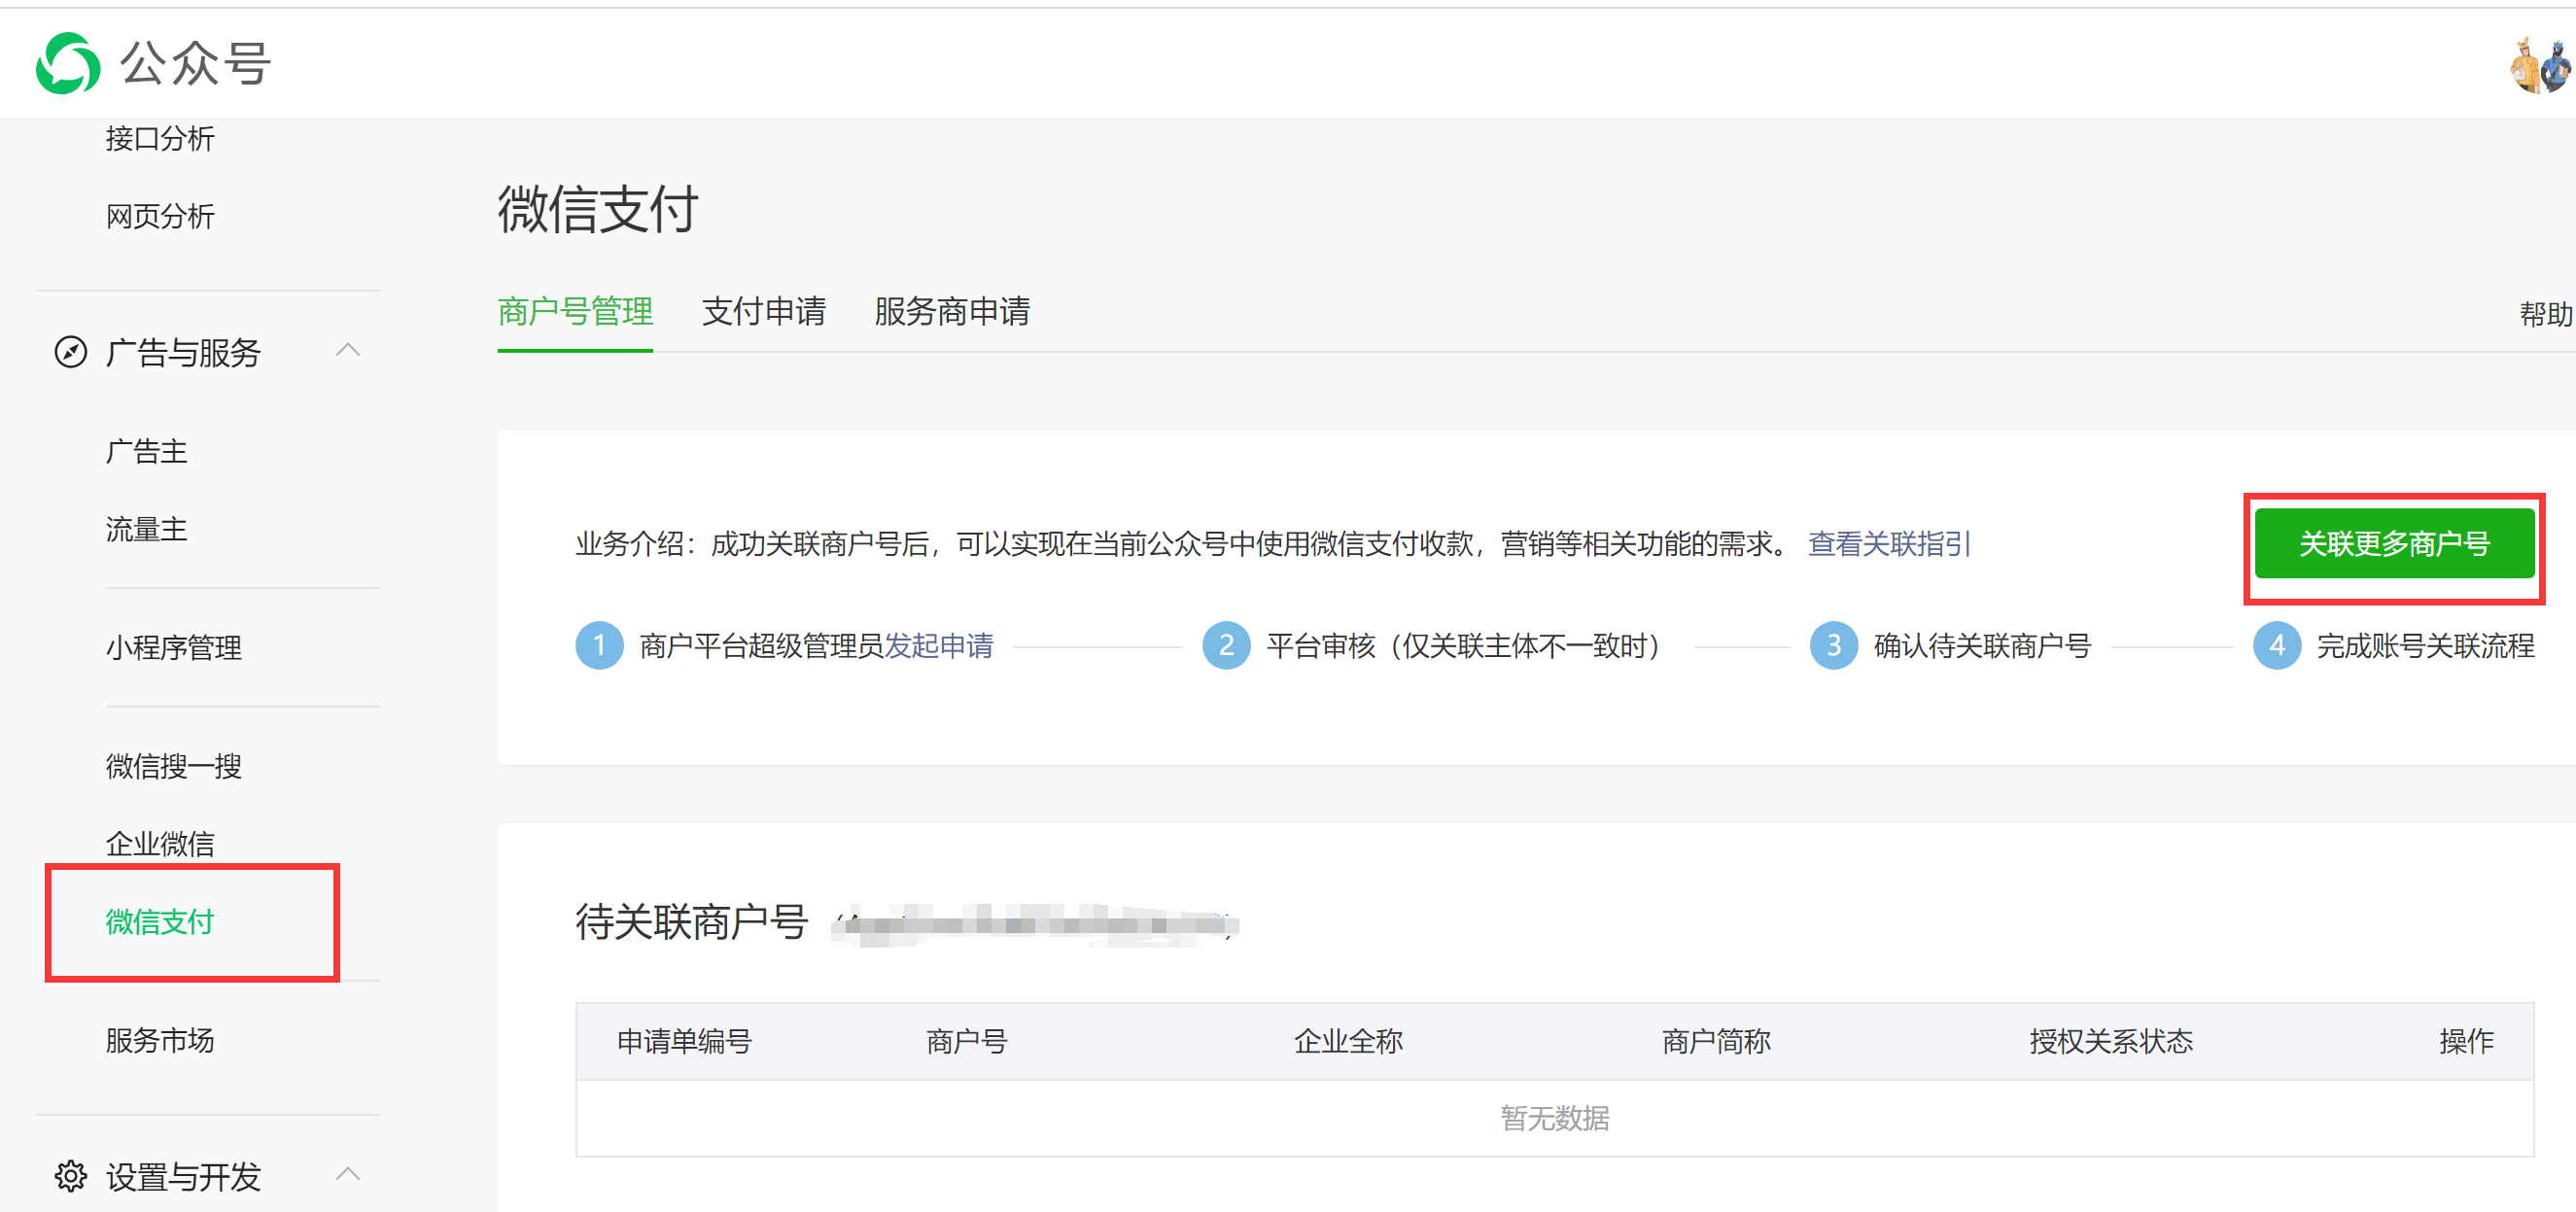
商户开通
点击公众号左侧微信支付菜单,选择右侧关联商户按钮,如果没有商户按指引申请
参数获取
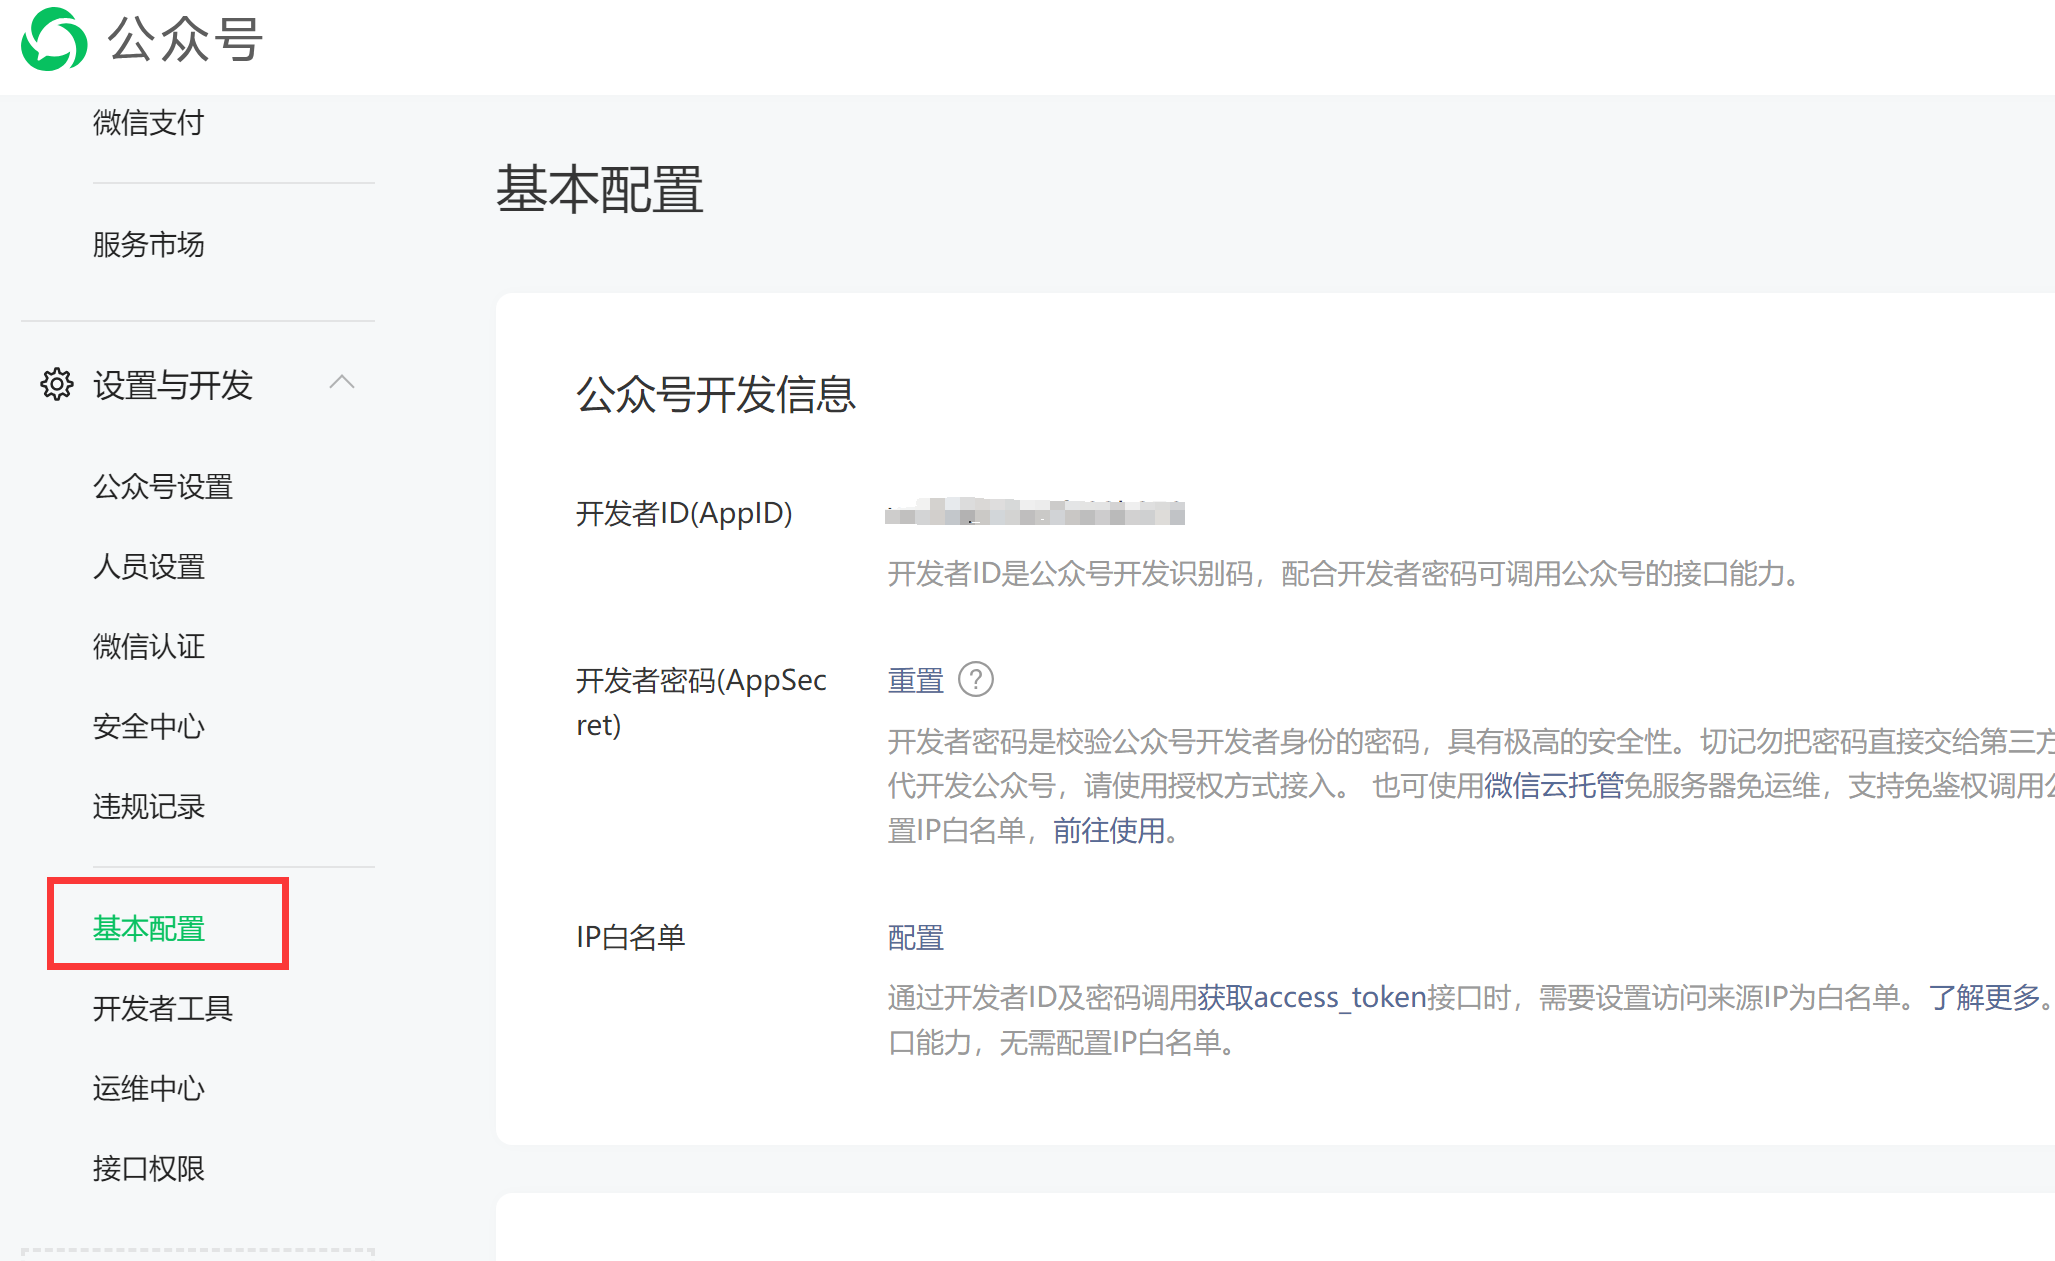
公众号参数
点击左侧基本配置菜单,记录右侧的应用ID(appid)
商户参数
点击公众号左侧微信支付菜单,滑动到已关联商户号,点击查看按钮
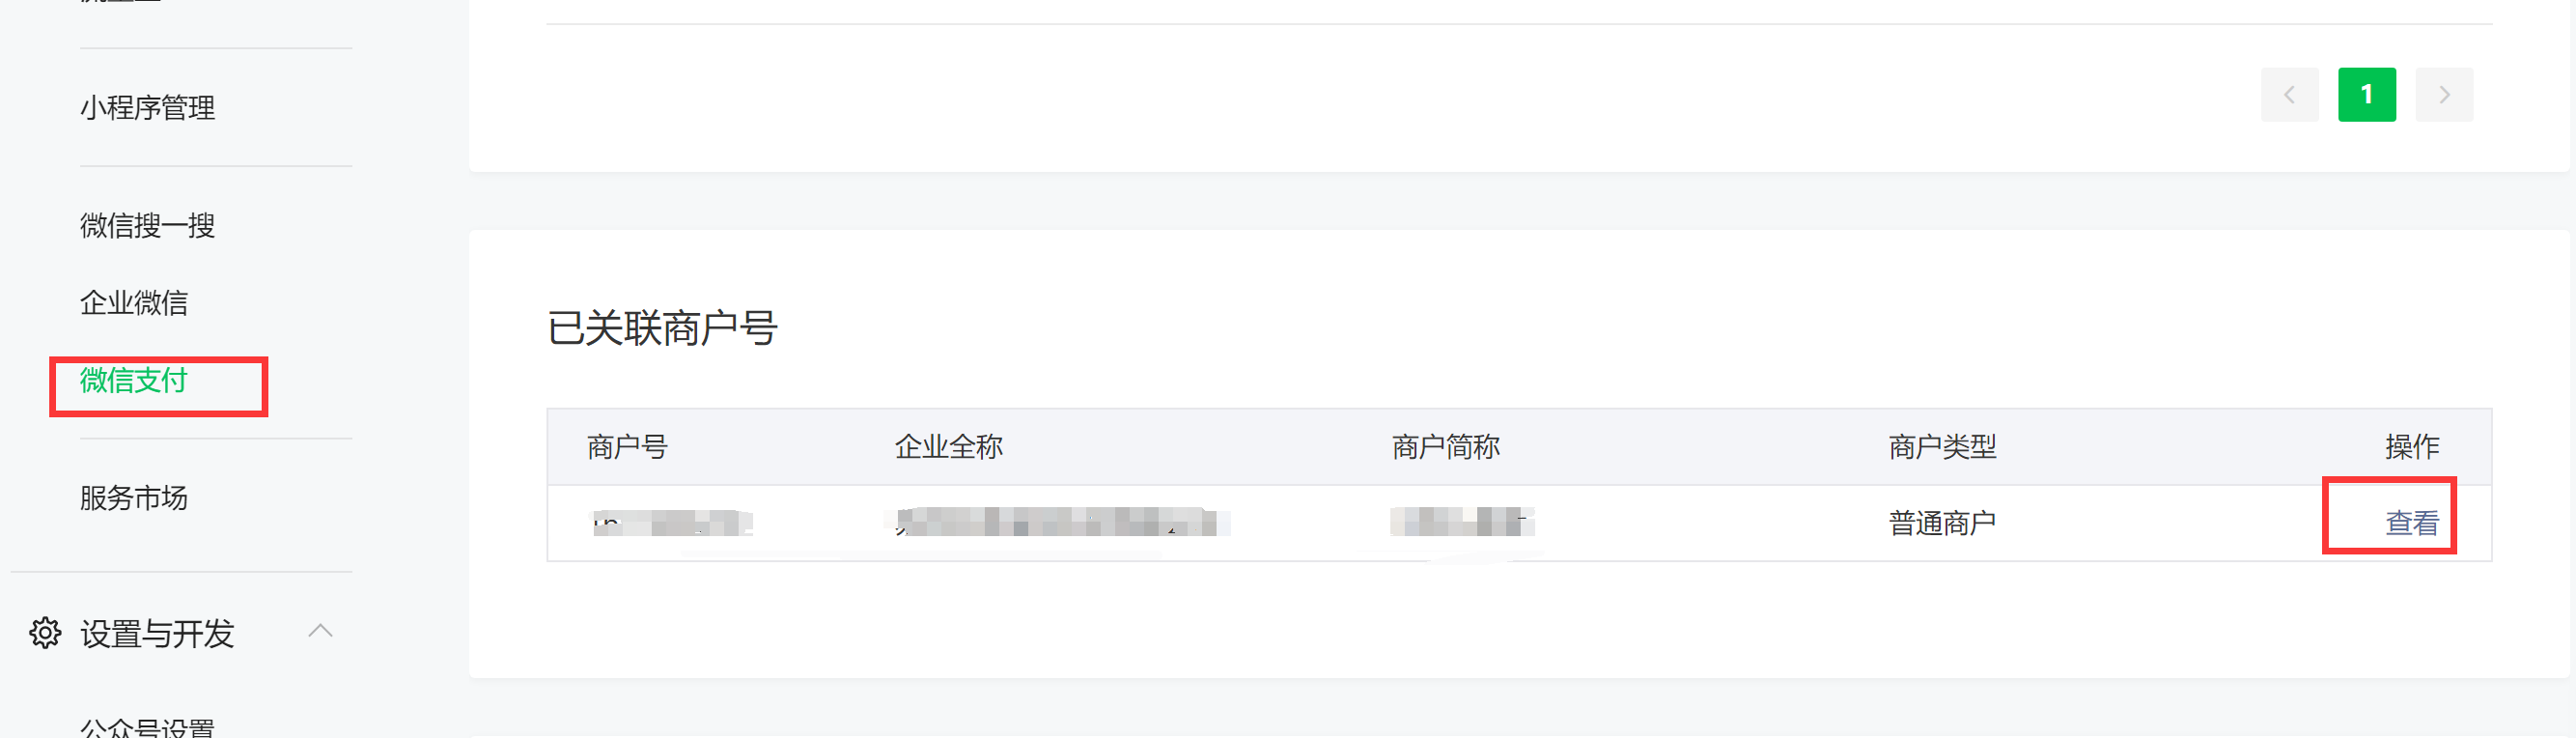
进入商户后,选择产品中心,左侧开发配置,记录商户号(mchId)

进入商户后,选择账户中心,左侧API安全,按照指引获取APIV3密钥(apiV3Key),API证书的序列号(merchantSerialNumber)和私钥文件apiclient_key.pem

参数配置
外网映射
在微信支付本地调试时需要用到外网映射工具,这里推荐NATAPP:https://natapp.cn/(非广)
一个月带备案域名的映射隧道12元,我们需要两个,一个映射公众号菜单页面,一个映射后端接口
公众号参数
进入公众点击左侧自定义菜单,右侧点击添加菜单,输入外网映射后的菜单地址

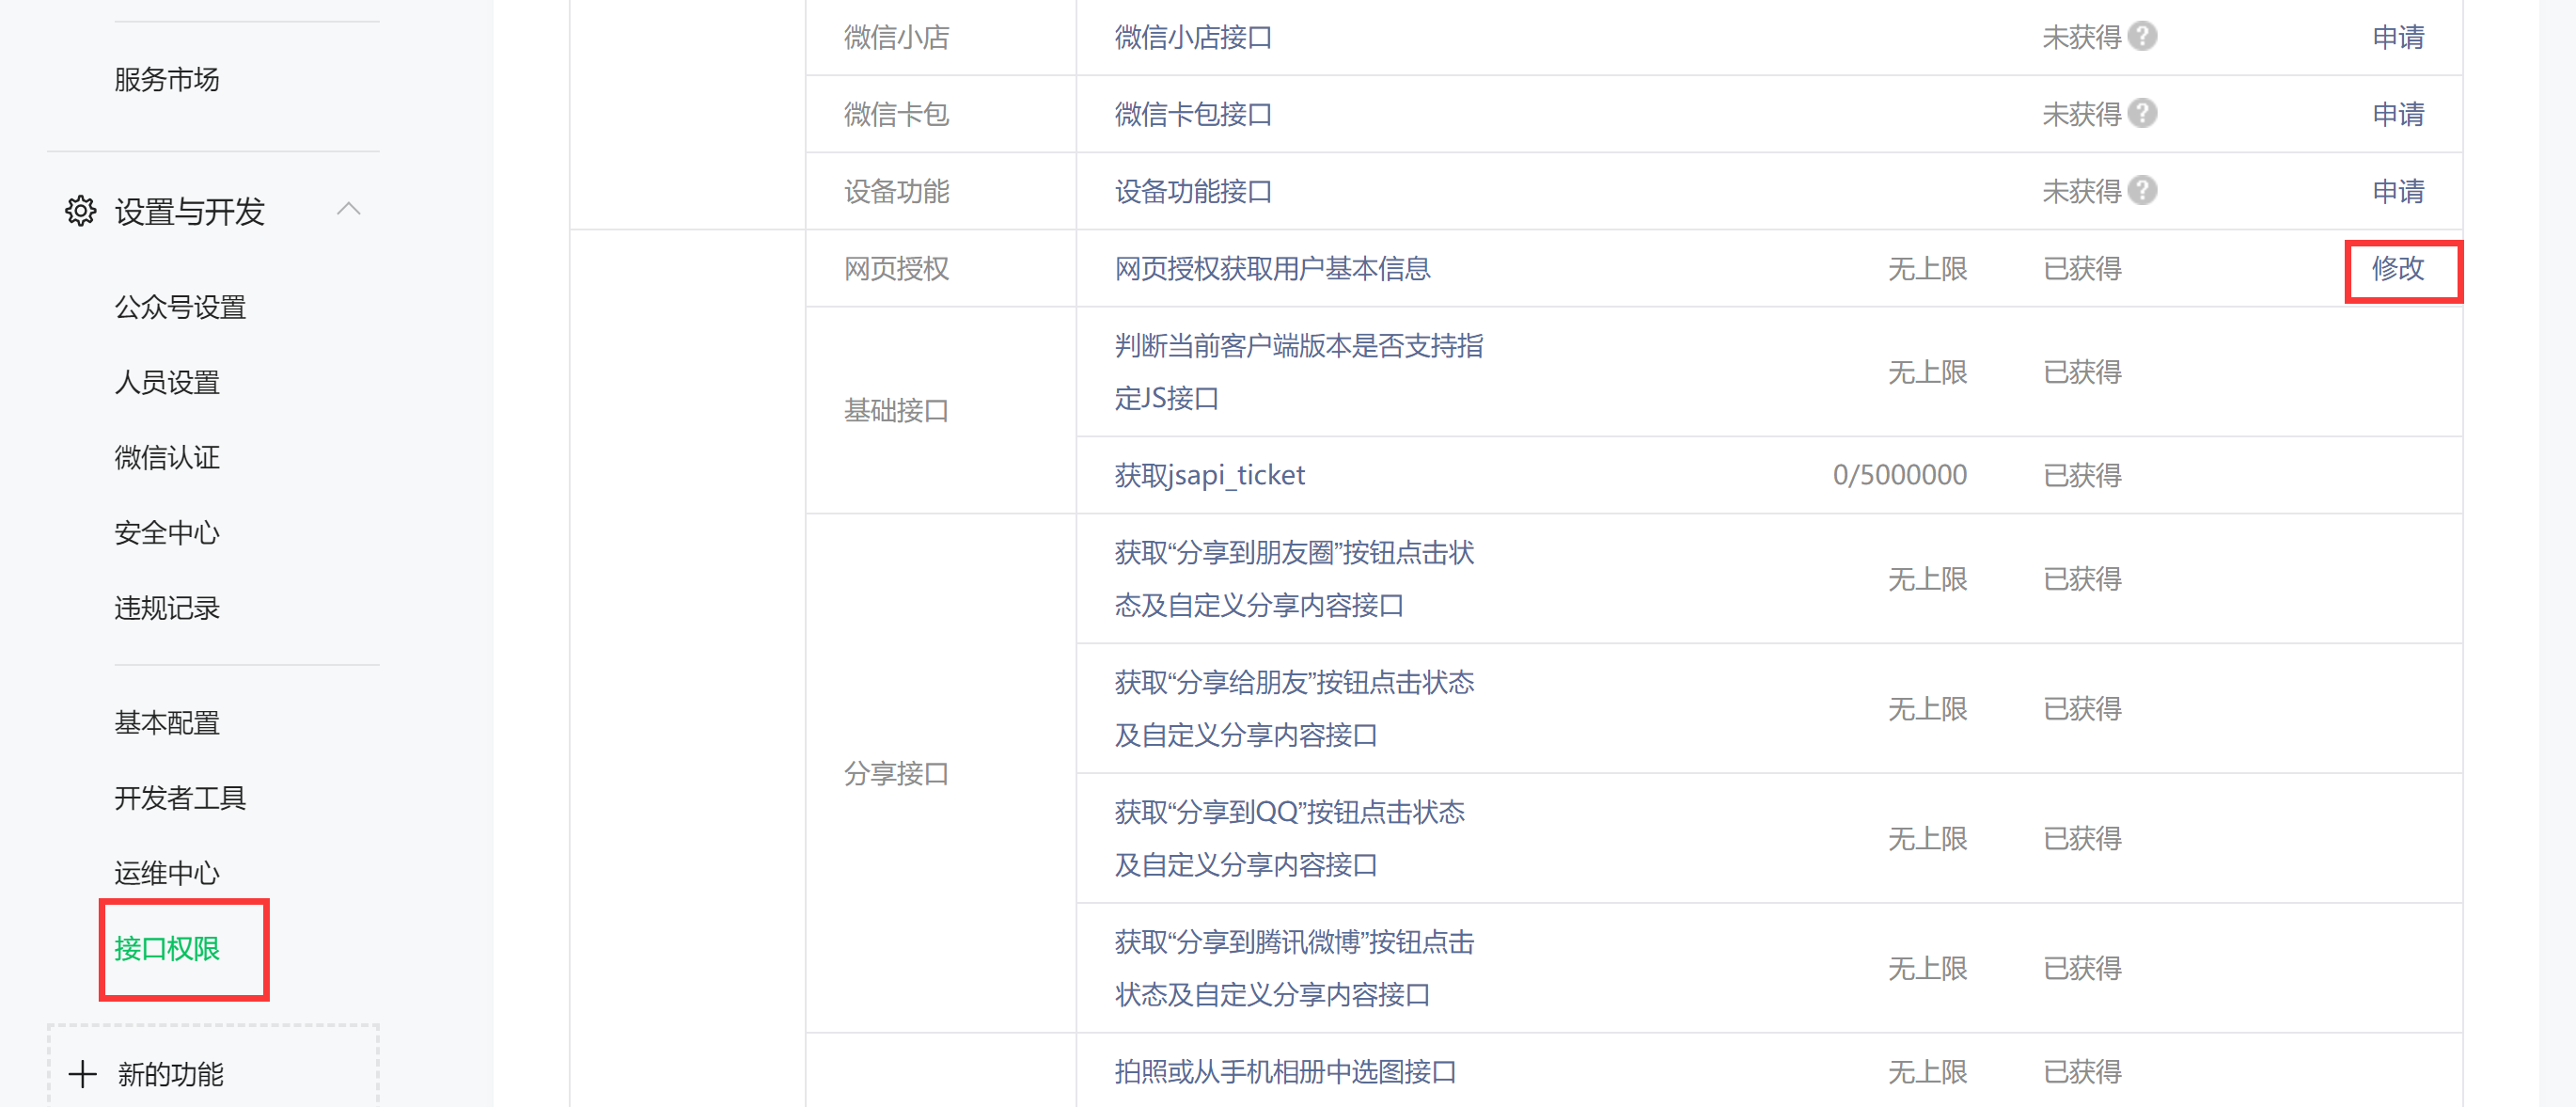
如果你是新手,需要进行网页授权认证获取用户openid,那你还需要进行网页授权域名的设置
点左侧接口权限菜单,修改右侧的网页授权用户信息获取
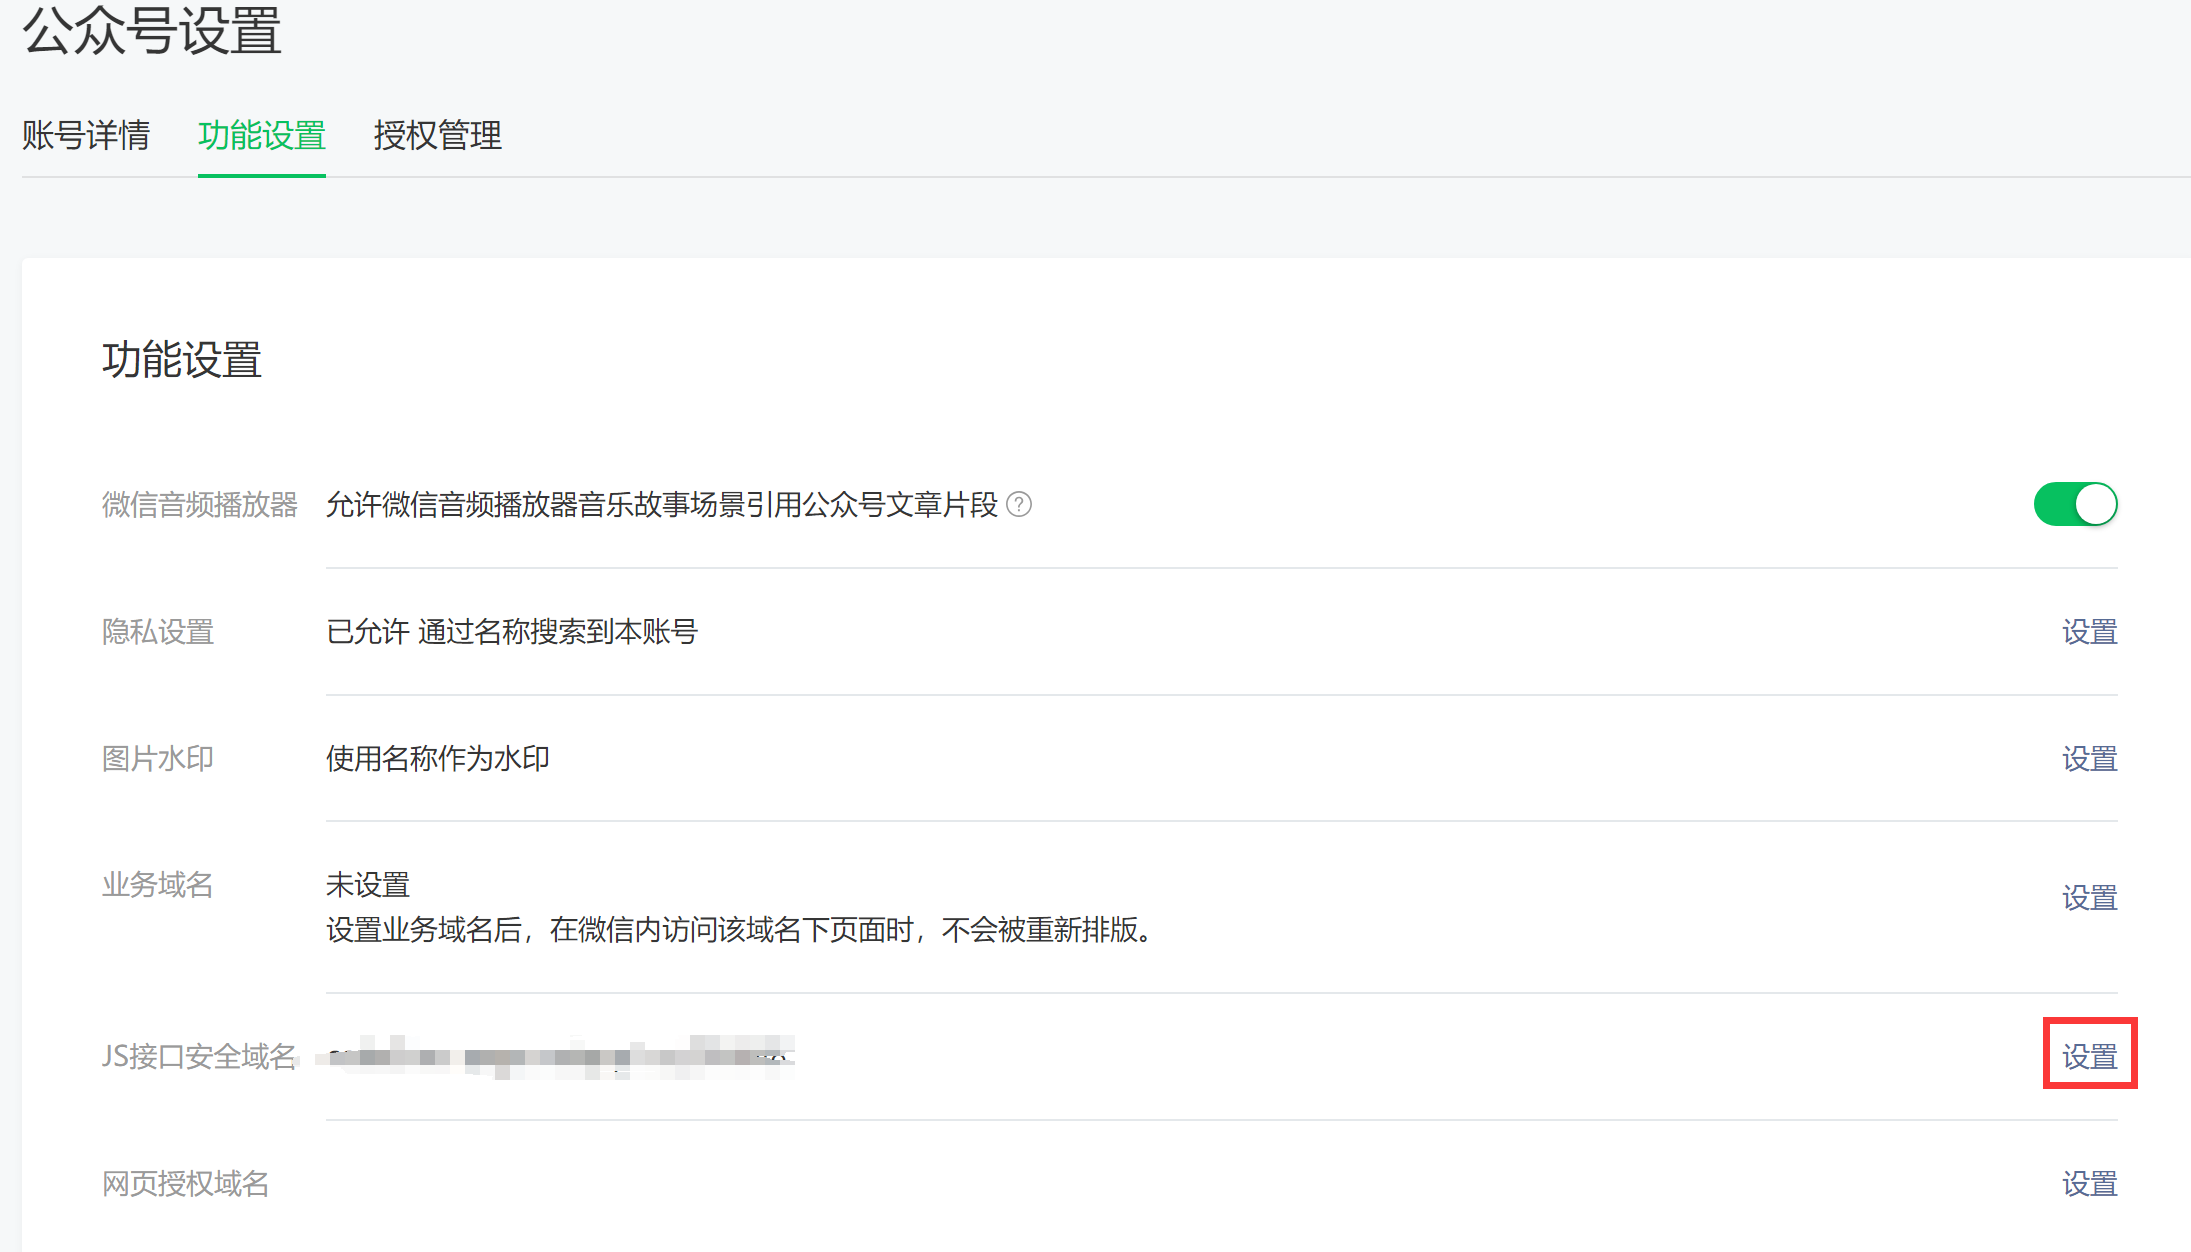
进入后设置JS接口安全域名,会需要将一个txt认证文件放置到你的静态页面目录,参照指引即可
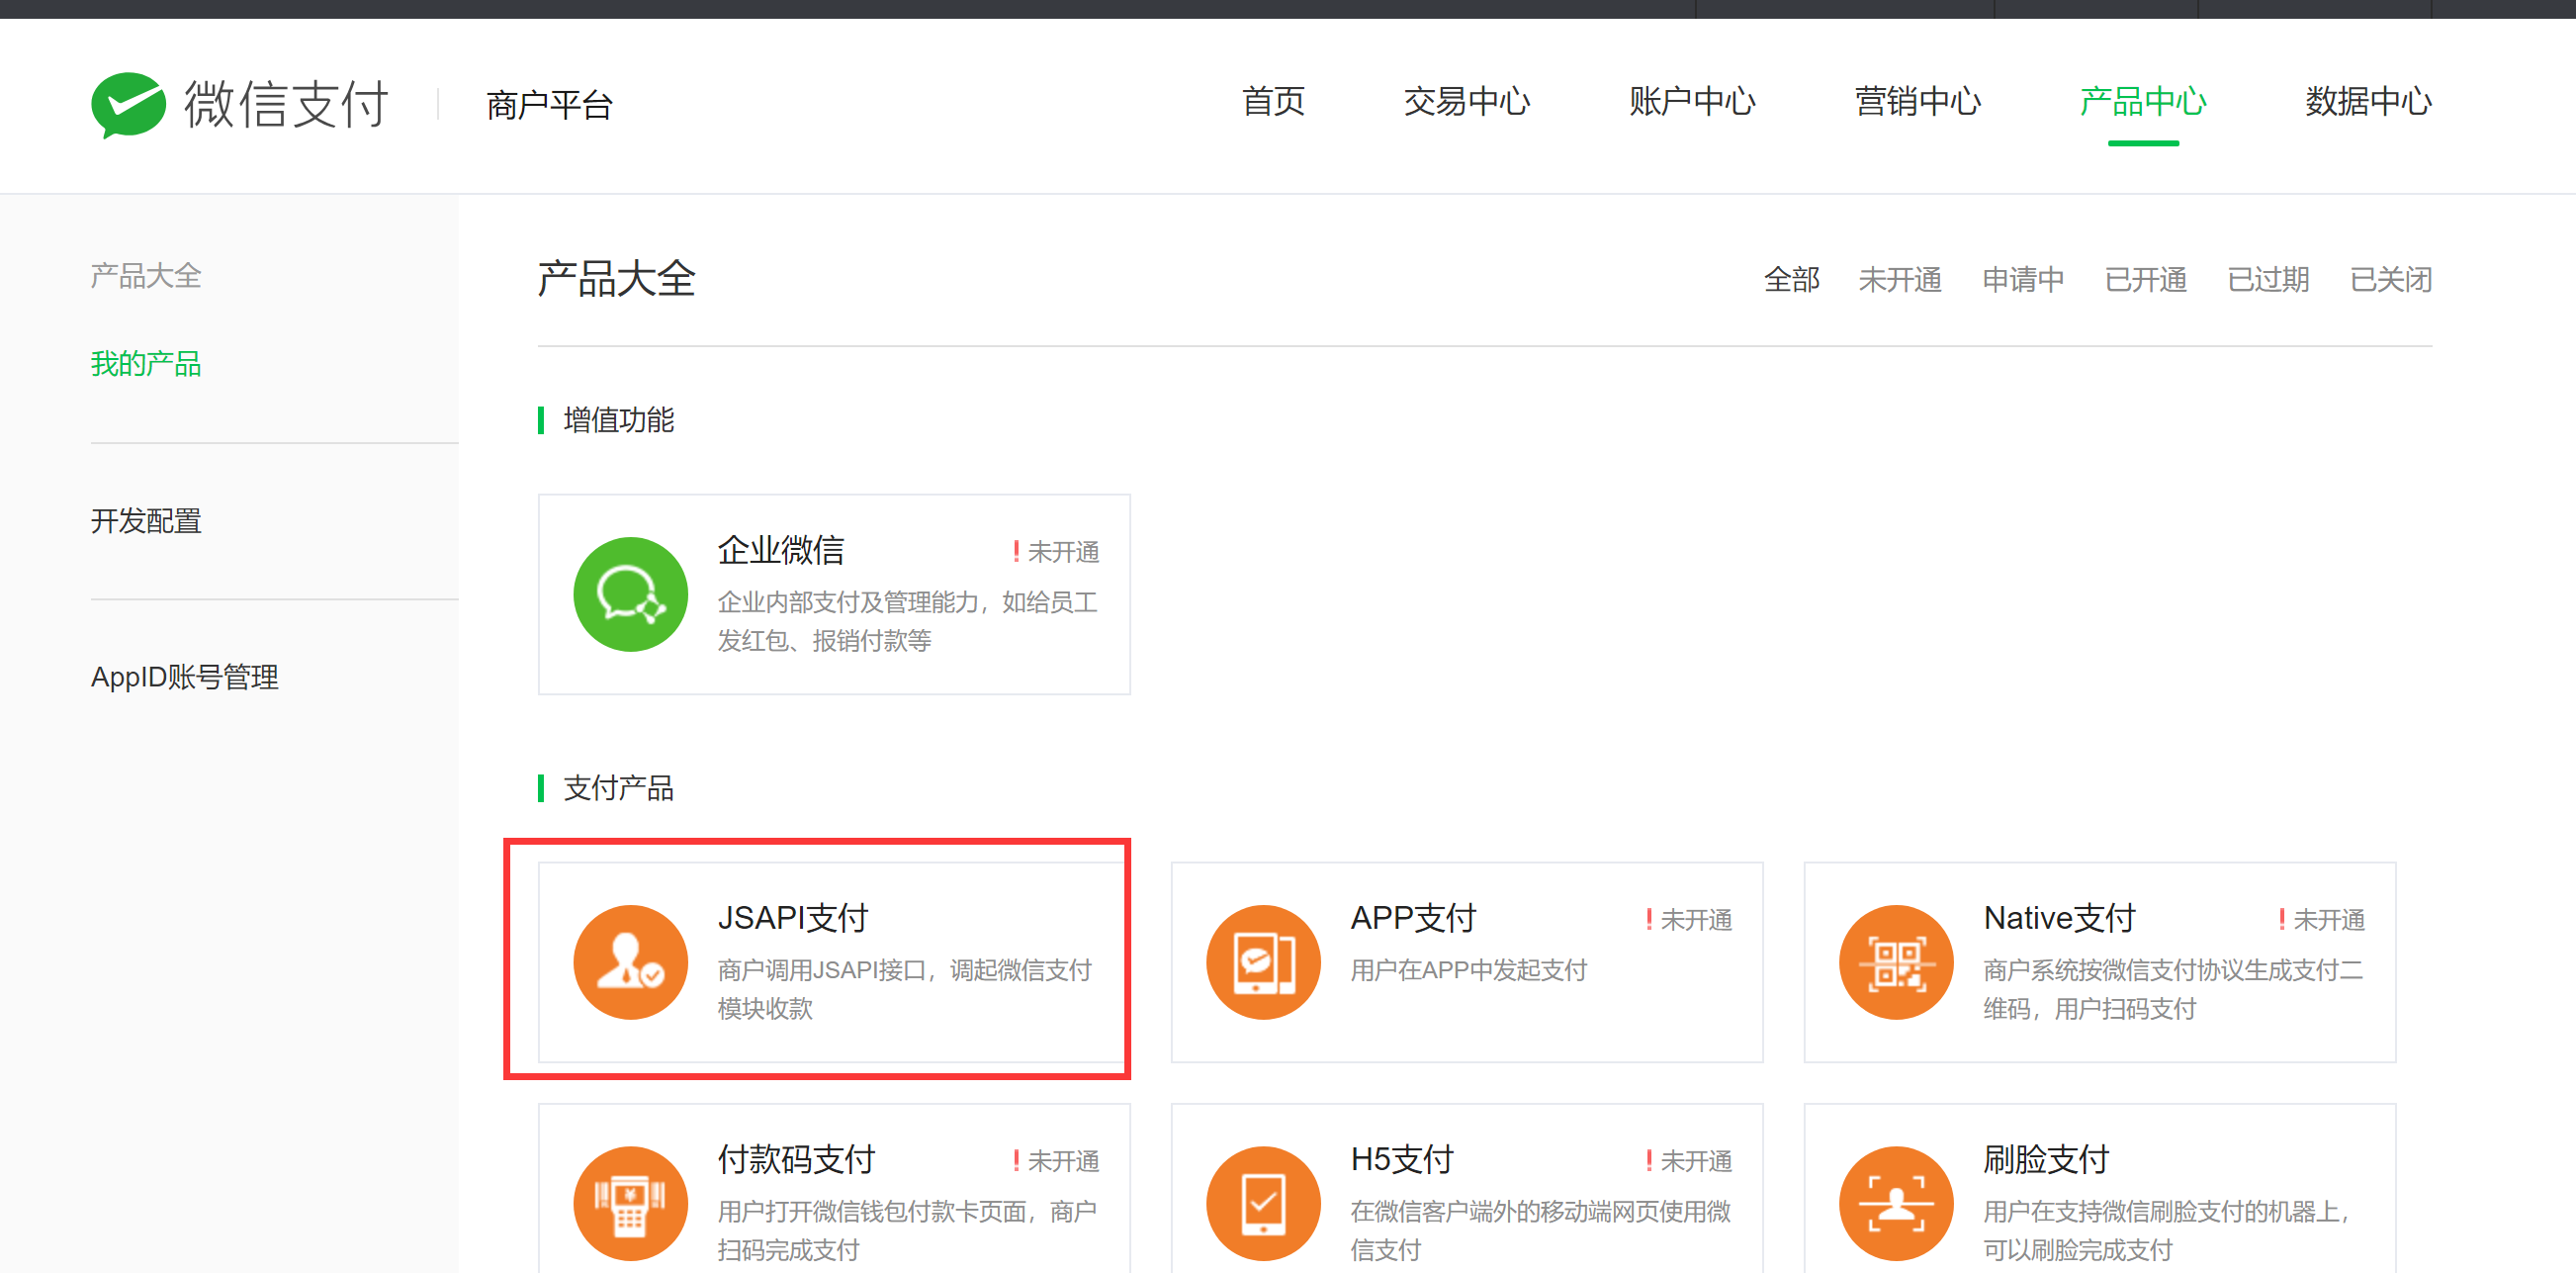
商户参数
进入商户后,选择产品中心,左侧我的产品,进入JSAPI支付
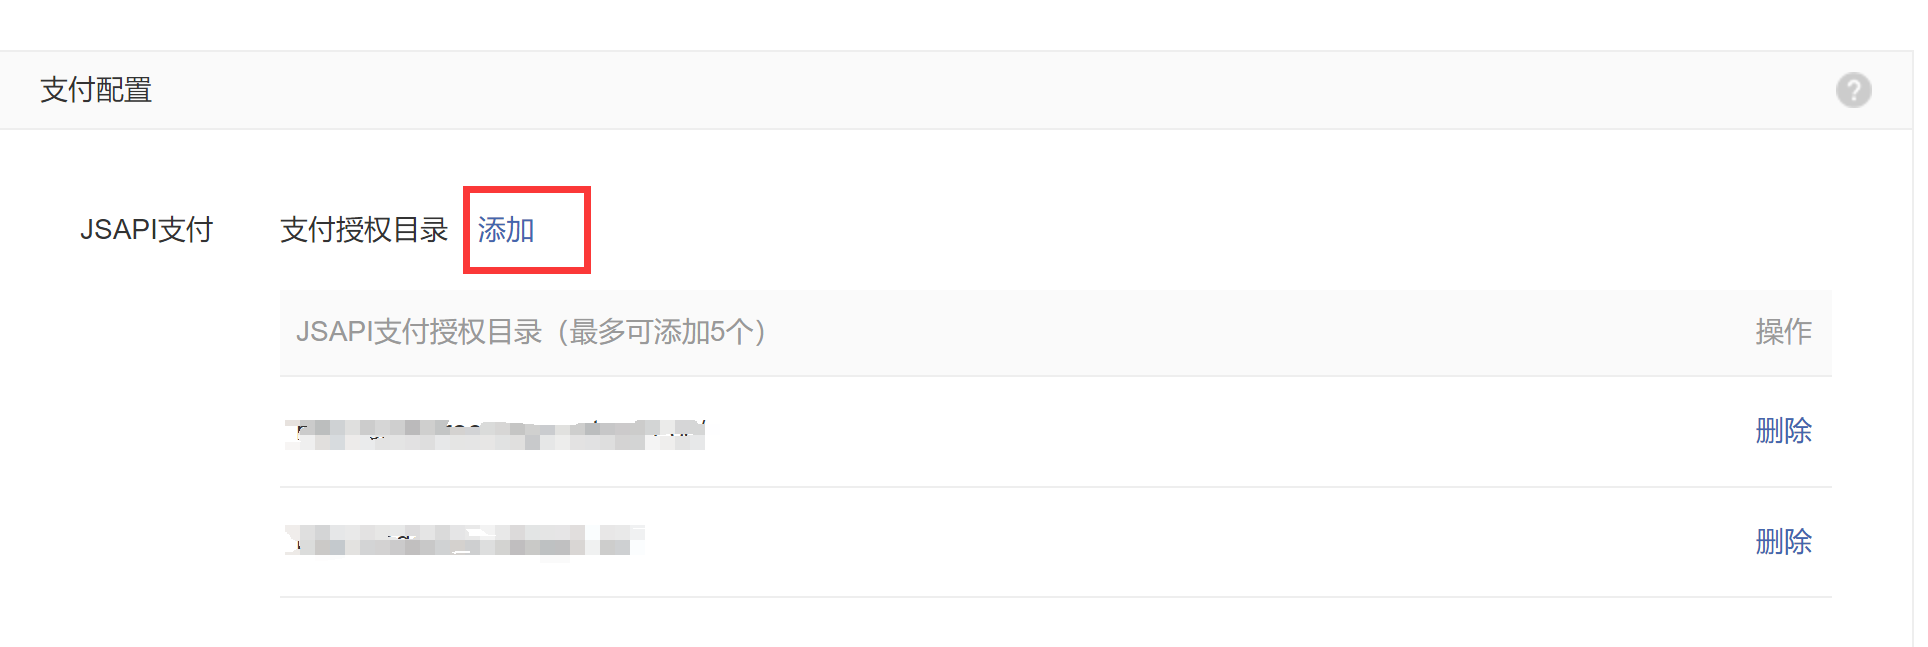
点击产品设置,在支付配置模块,添加支付授权目录(后端接口和前端网页都添加)
支付对接
参数声明
wechartpay:
  # 公众号id
  appId: xxx
  # 公众号中微信支付绑定的商户的商户号
  mchId: xxxx
  # 商户apiV3Keyz密钥
  apiV3Key: xxxx
  #商户证书序列号
  merchantSerialNumber: xxxx
  # 支付回调地址
  v3PayNotifyUrl: http://xxxxxx/wechatpay/pay_notify
  # 退款回调地址
  v3BackNotifyUrl: http://xxxxx/wechatpay/back_notify
	@Value("${wechartpay.appId}")
    private String appId;
    @Value("${wechartpay.mchId}")
    private String mchId;
    @Value("${wechartpay.apiV3Key}")
    private String apiV3Key;
    @Value("${wechartpay.merchantSerialNumber}")
    private String merchantSerialNumber;
    @Value("${wechartpay.v3PayNotifyUrl}")
    private String v3PayNotifyUrl;
    @Value("${wechartpay.v3BackNotifyUrl}")
    private String v3BackNotifyUrl;

	public static RSAAutoCertificateConfig config = null;
    public static JsapiServiceExtension service = null;
    public static RefundService backService = null;

	private void initPayConfig() {
        initConfig();
        // 构建service
        if (service == null) {
            service = new JsapiServiceExtension.Builder().config(config).build();
        }
    }

    private void initBackConfig() {
        initConfig();
        // 构建service
        if (backService == null) {
            backService = new RefundService.Builder().config(config).build();
        }
    }

    private void initConfig() {
        String filePath = getFilePath("apiclient_key.pem");
        if (config == null) {
            config = new RSAAutoCertificateConfig.Builder()
                    .merchantId(mchId)
                    .privateKeyFromPath(filePath)
                    .merchantSerialNumber(merchantSerialNumber)
                    .apiV3Key(apiV3Key)
                    .build();
        }
    }

    public RSAAutoCertificateConfig getConfig() {
        initConfig();
        return config;
    }

    public static String getFilePath(String classFilePath) {
        String filePath = "";
        try {
            String templateFilePath = "tempfiles/classpathfile/";
            File tempDir = new File(templateFilePath);
            if (!tempDir.exists()) {
                tempDir.mkdirs();
            }
            String[] filePathList = classFilePath.split("/");
            String checkFilePath = "tempfiles/classpathfile";
            for (String item : filePathList) {
                checkFilePath += "/" + item;
            }
            File tempFile = new File(checkFilePath);
            if (tempFile.exists()) {
                filePath = checkFilePath;
            } else {
                //解析
                ClassPathResource classPathResource = new ClassPathResource(classFilePath);
                InputStream inputStream = classPathResource.getInputStream();
                checkFilePath = "tempfiles/classpathfile";
                for (int i = 0; i < filePathList.length; i++) {
                    checkFilePath += &q