1.1 gradle搭建源码调试环境
1)搭建gradle环境
4个步骤
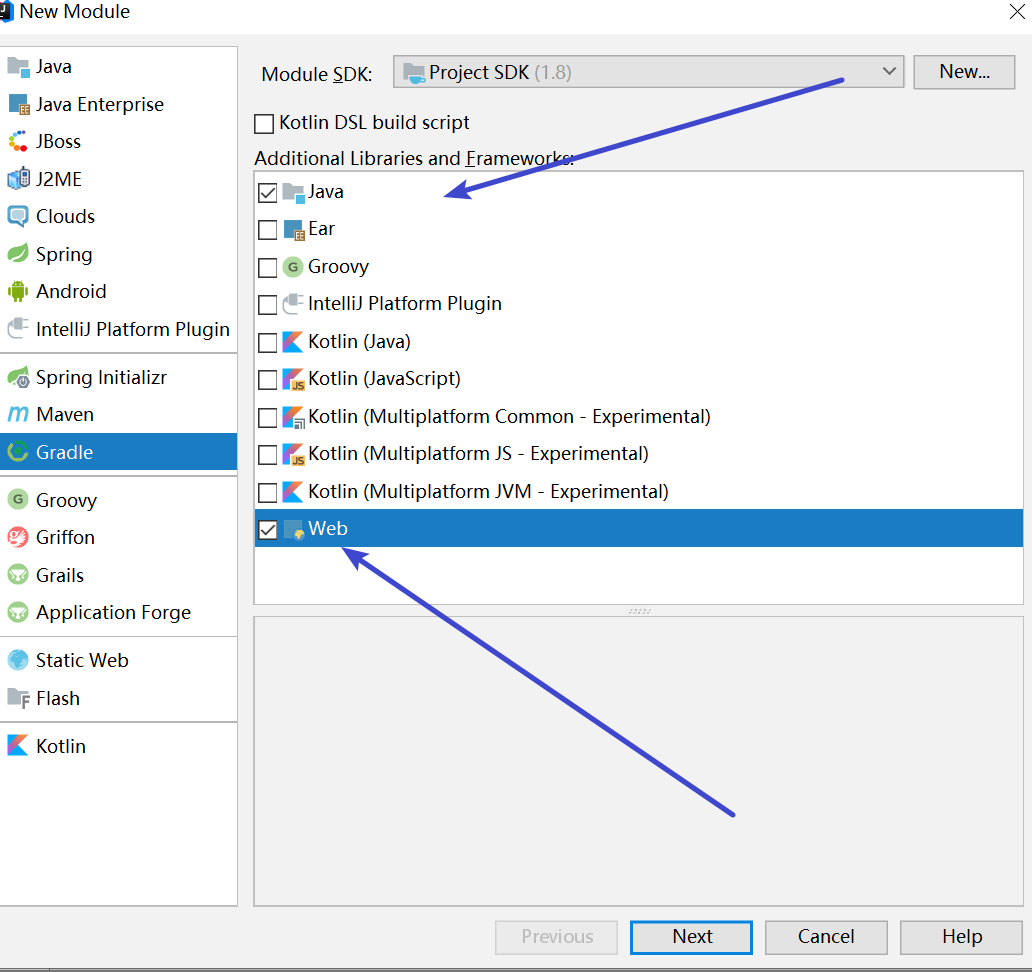
1、File-New-Module
选择java和web
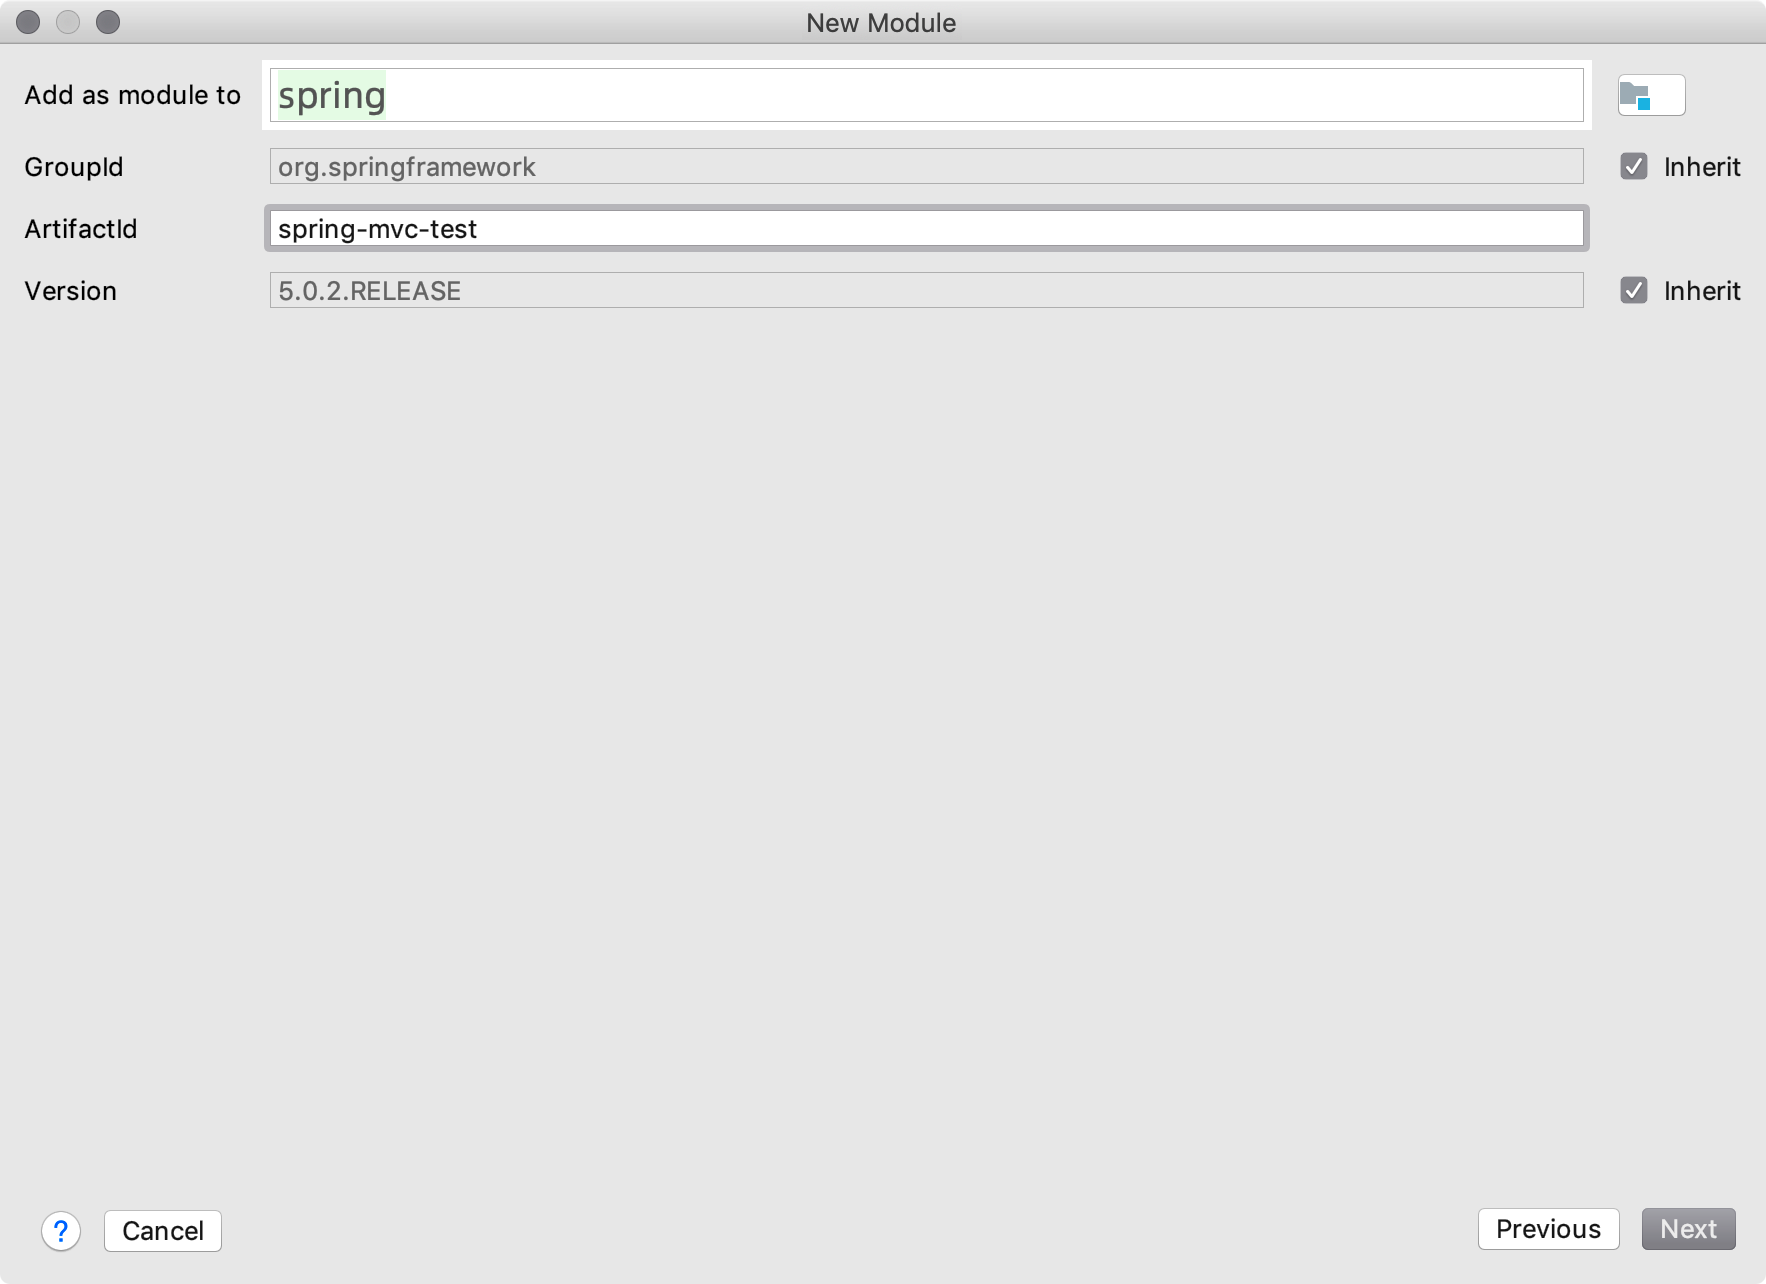
2、填写包信息
3、存储路径

2)增加起步依赖
依赖的项目,直接复制粘贴上去
1、对spring的依赖
2、对MVC的依赖
3、对Tomcat插件的依赖
build.gradle
group 'com.spring.test'
version '5.0.2.RELEASE'

apply plugin: 'java'
apply plugin: 'war'
apply plugin: 'com.bmuschko.tomcat' //tomcat: 插件
// tomcat: 以下配置会在第一次启动时下载插件二进制文件
//在项目根目录中执行gradle tomcatRun
buildscript {
    repositories {
        jcenter()
    }

    dependencies {
        classpath 'com.bmuschko:gradle-tomcat-plugin:2.5'
    }
}
// 配置阿里源
allprojects {
    repositories {
        maven{ url 'http://maven.aliyun.com/nexus/content/groups/public/'}
    }
}


dependencies {
    testCompile group: 'org.testng', name: 'testng', version: '6.14.3'
    runtime 'javax.servlet:jstl:1.1.2' // Servlet容器必需
    compile(project(':spring-context'))
    compile(project(':spring-web'))
    compile(project(':spring-webmvc'))

    // tomcat: 将Tomcat运行时库添加到配置tomcat中: (此处为Tomcat9)
    def tomcatVersion = '9.0.1'
    tomcat "org.apache.tomcat.embed:tomcat-embed-core:${tomcatVersion}",
            "org.apache.tomcat.embed:tomcat-embed-logging-juli:9.0.0.M6",
            "org.apache.tomcat.embed:tomcat-embed-jasper:${tomcatVersion}"
}

// tomcat: 一些协议设置(注意,这里必须加上,不然会抛tomcat的异常,仅限tomcat9)
tomcat {
    httpProtocol = 'org.apache.coyote.http11.Http11Nio2Protocol'
    ajpProtocol  = 'org.apache.coyote.ajp.AjpNio2Protocol'
}


// UTF-8
tasks.withType(JavaCompile) {
    options.encoding = "UTF-8"
}
3)MVC代码编写
前提:
增加WEB-INF目录和Web.xml
1、打开File - Proect Structrue
2、选中刚才的mvc项目,展开,选中web gradle , 到右边 点击加号
3、确认路径
spring-mvc-test\src\main\webapp\WEB-INF\web.xml
WEB-INF和xml创建完毕

webapp/WEB-INF/web.xml
<?xml version="1.0" encoding="UTF-8"?>
<web-app xmlns="http://xmlns.jcp.org/xml/ns/javaee"
         xmlns:xsi="http://www.w3.org/2001/XMLSchema-instance"
         xsi:schemaLocation="http://xmlns.jcp.org/xml/ns/javaee http://xmlns.jcp.org/xml/ns/javaee/web-app_4_0.xsd"
         version="4.0">

	<!-- Spring MVC配置 -->
	<servlet>
		<servlet-name>mvc</servlet-name>
		<servlet-class>org.springframework.web.servlet.DispatcherServlet</servlet-class>
		<init-param>
			<param-name>contextConfigLocation</param-name>
			<param-value>classpath:mvc-servlet.xml</param-value>
			<!--<param-value>/WEB-INF/mvc-servlet.xml</param-value>-->
		</init-param>
		<!-- load-on-startup元素标记容器是否在启动的时候就加载这个servlet(实例化并调用其init()方法) -->
		<load-on-startup>1</load-on-startup>
	</servlet>
	<servlet-mapping>
		<servlet-name>mvc</servlet-name>
		<url-pattern>/</url-pattern>
	</servlet-mapping>

</web-app>
resources/mvc-servlet.xml
<beans xmlns="http://www.springframework.org/schema/beans"
	   xmlns:mvc="http://www.springframework.org/schema/mvc"
	   xmlns:context="http://www.springframework.org/schema/context"
	   xmlns:xsi="http://www.w3.org/2001/XMLSchema-instance"
	   xsi:schemaLocation="
        http://www.springframework.org/schema/beans
        http://www.springframework.org/