1 Spring boot源码环境构建
推荐环境:
idea:2020.3
gradle:版本gradle-6.5.1
jdk:1.8
注意!idea和gradle的版本有兼容性问题,要注意搭配
1.1 Spring boot源码下载
1、从github获取源码,网址:
https://github.com/spring-projects/spring-boot
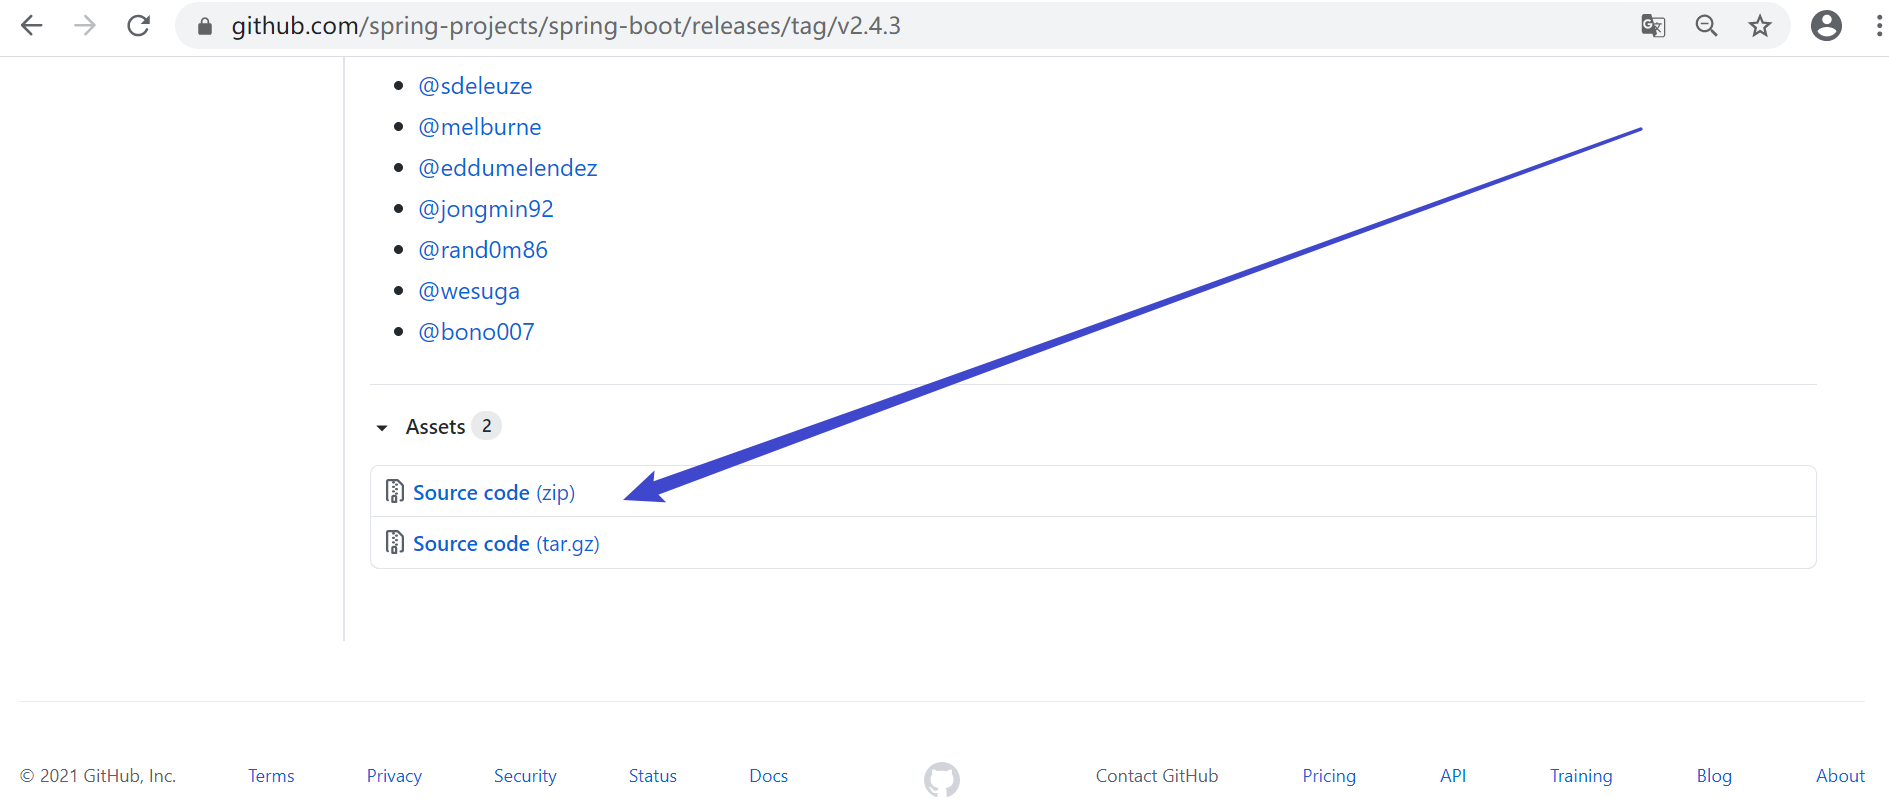
我们要搭建的是2.4.3.RELEASE版本,所以点击release 之后在tags查找相应版本或者访问
https://github.com/spring-projects/spring-boot/releases/tag/v2.4.3
找到 后点击sourcecode下载源码压缩包
目录结构
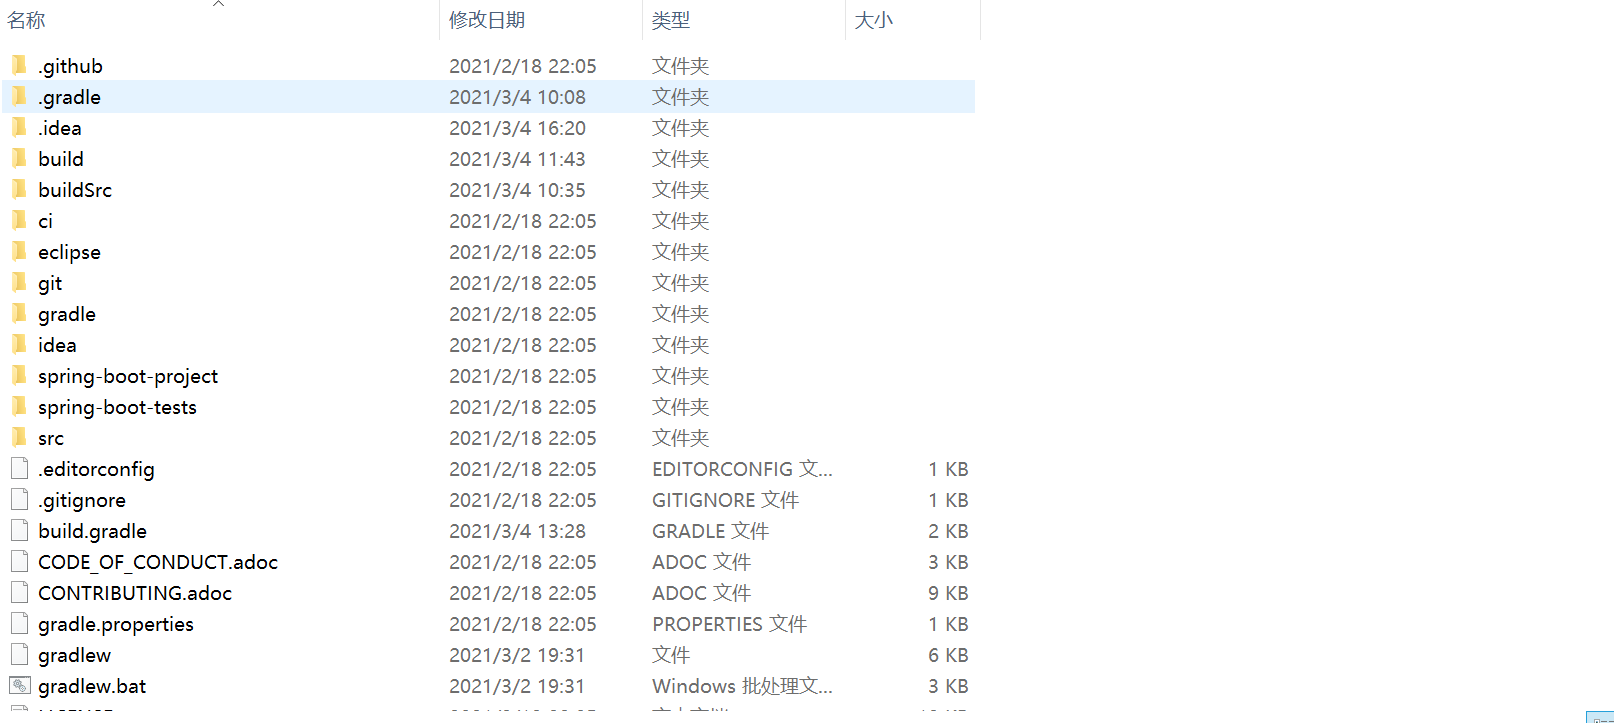
Spring-boot-project 核心代码,代码量很多(197508 行)
Spring-boot-tests 测试代码
2、直接用提供的源码包(推荐)
将源码导入到idea。漫长的等待……
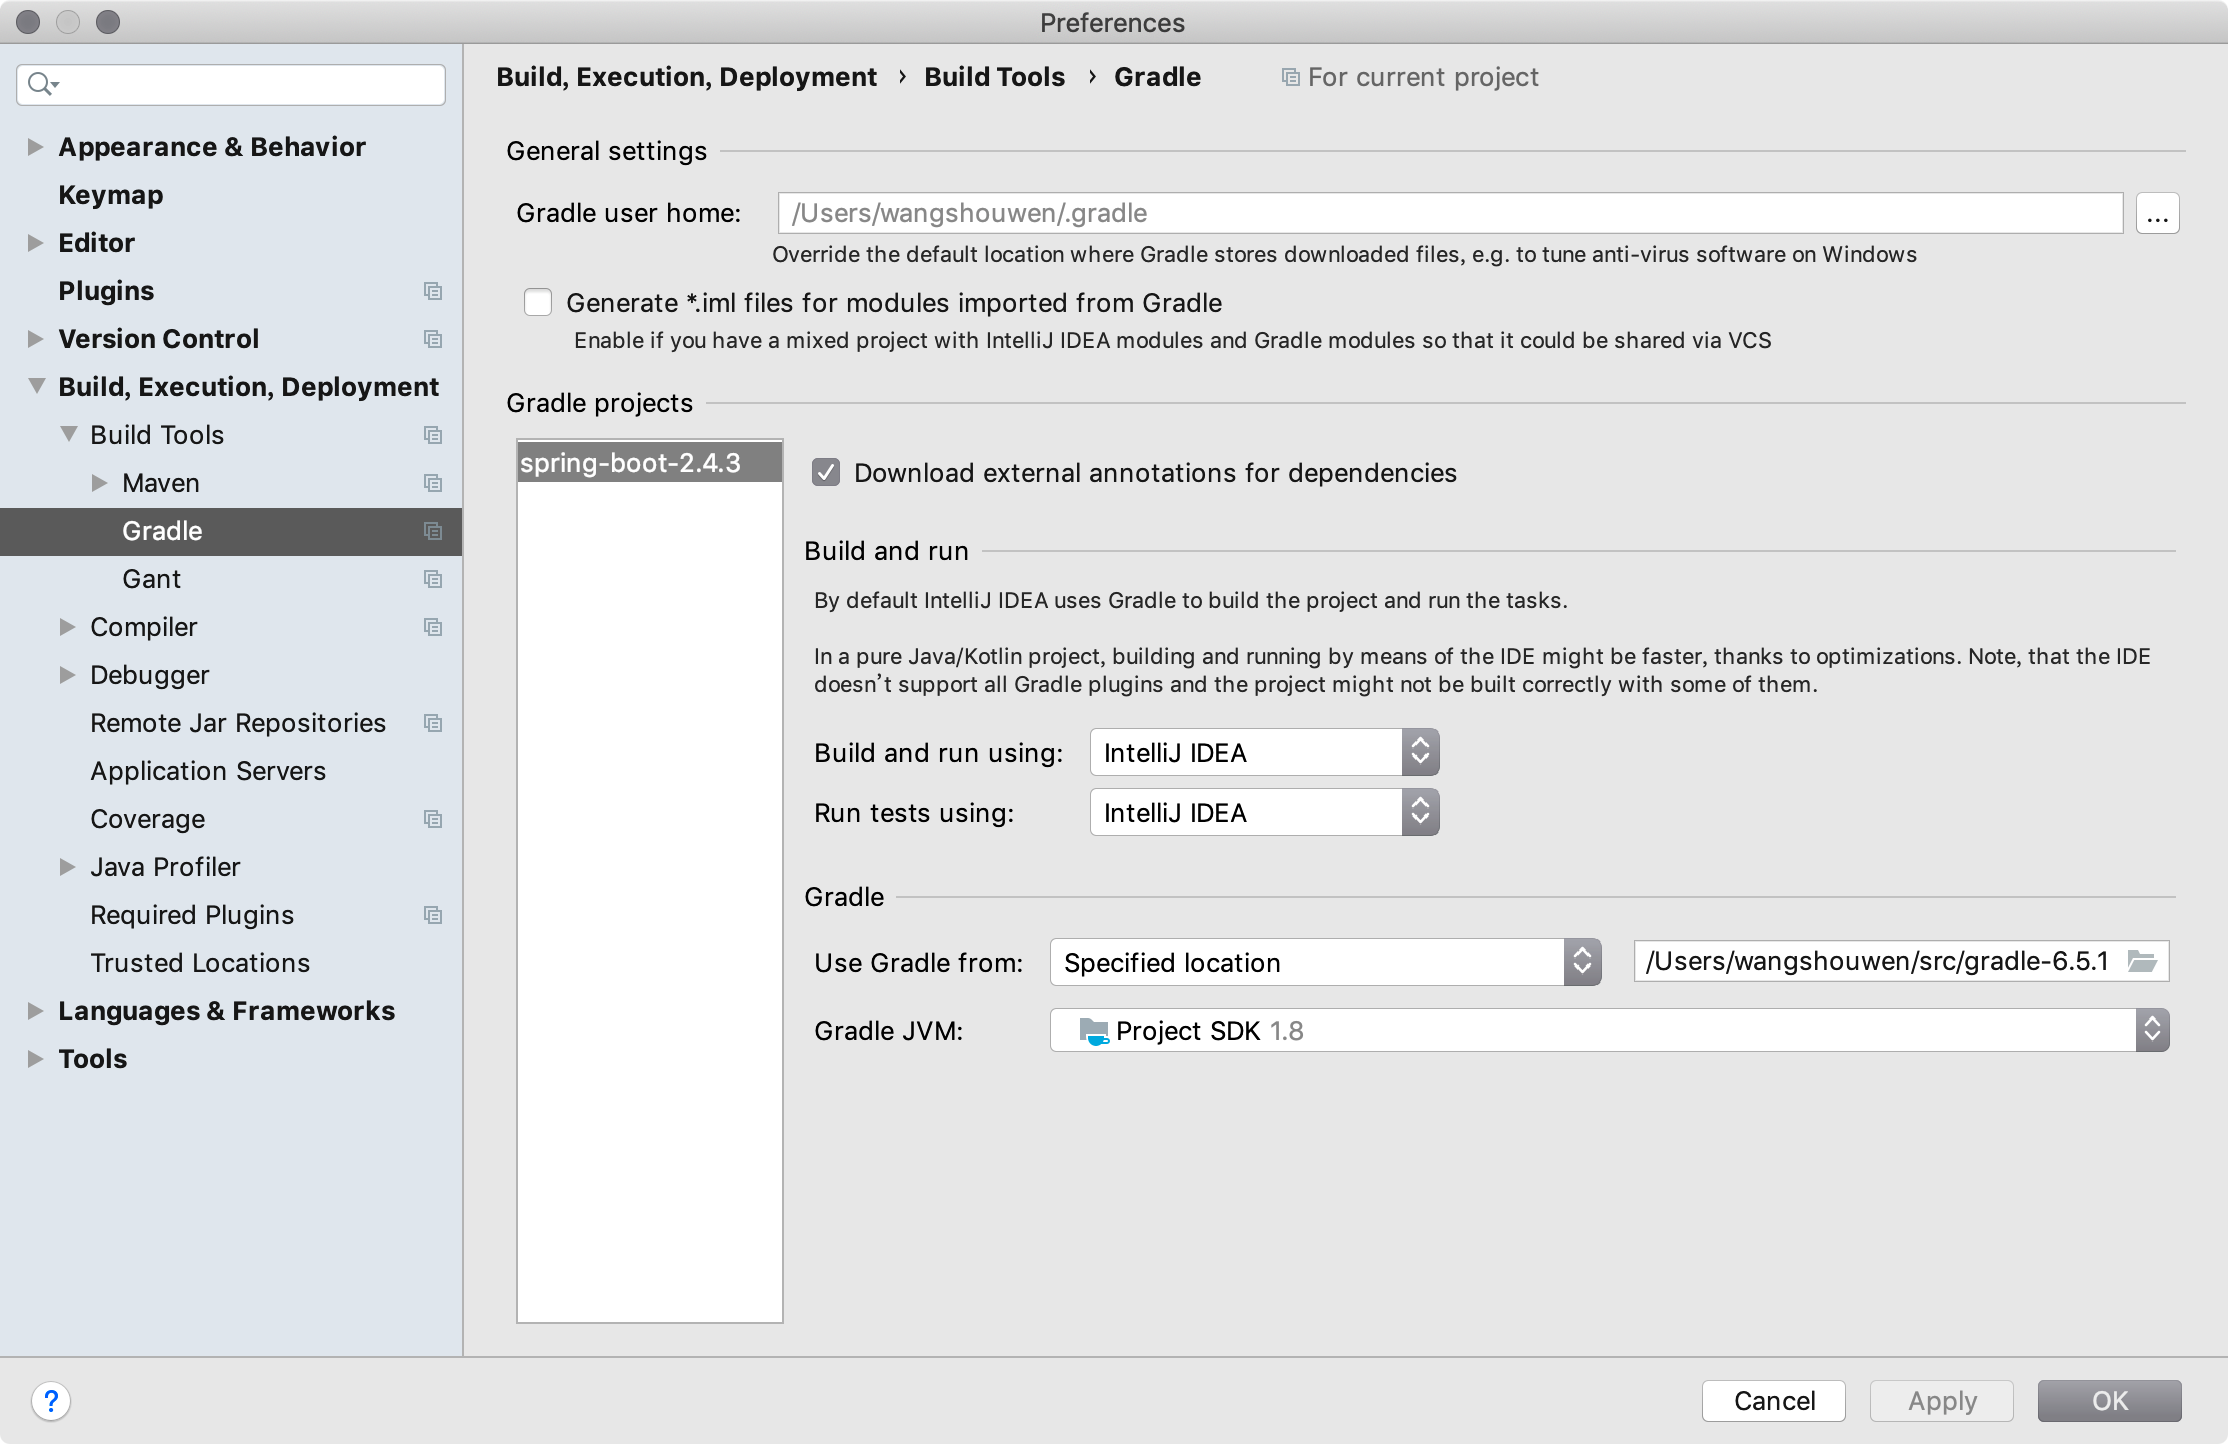
1.2 Spring boot源码编译
1、环境配置
推荐配置:
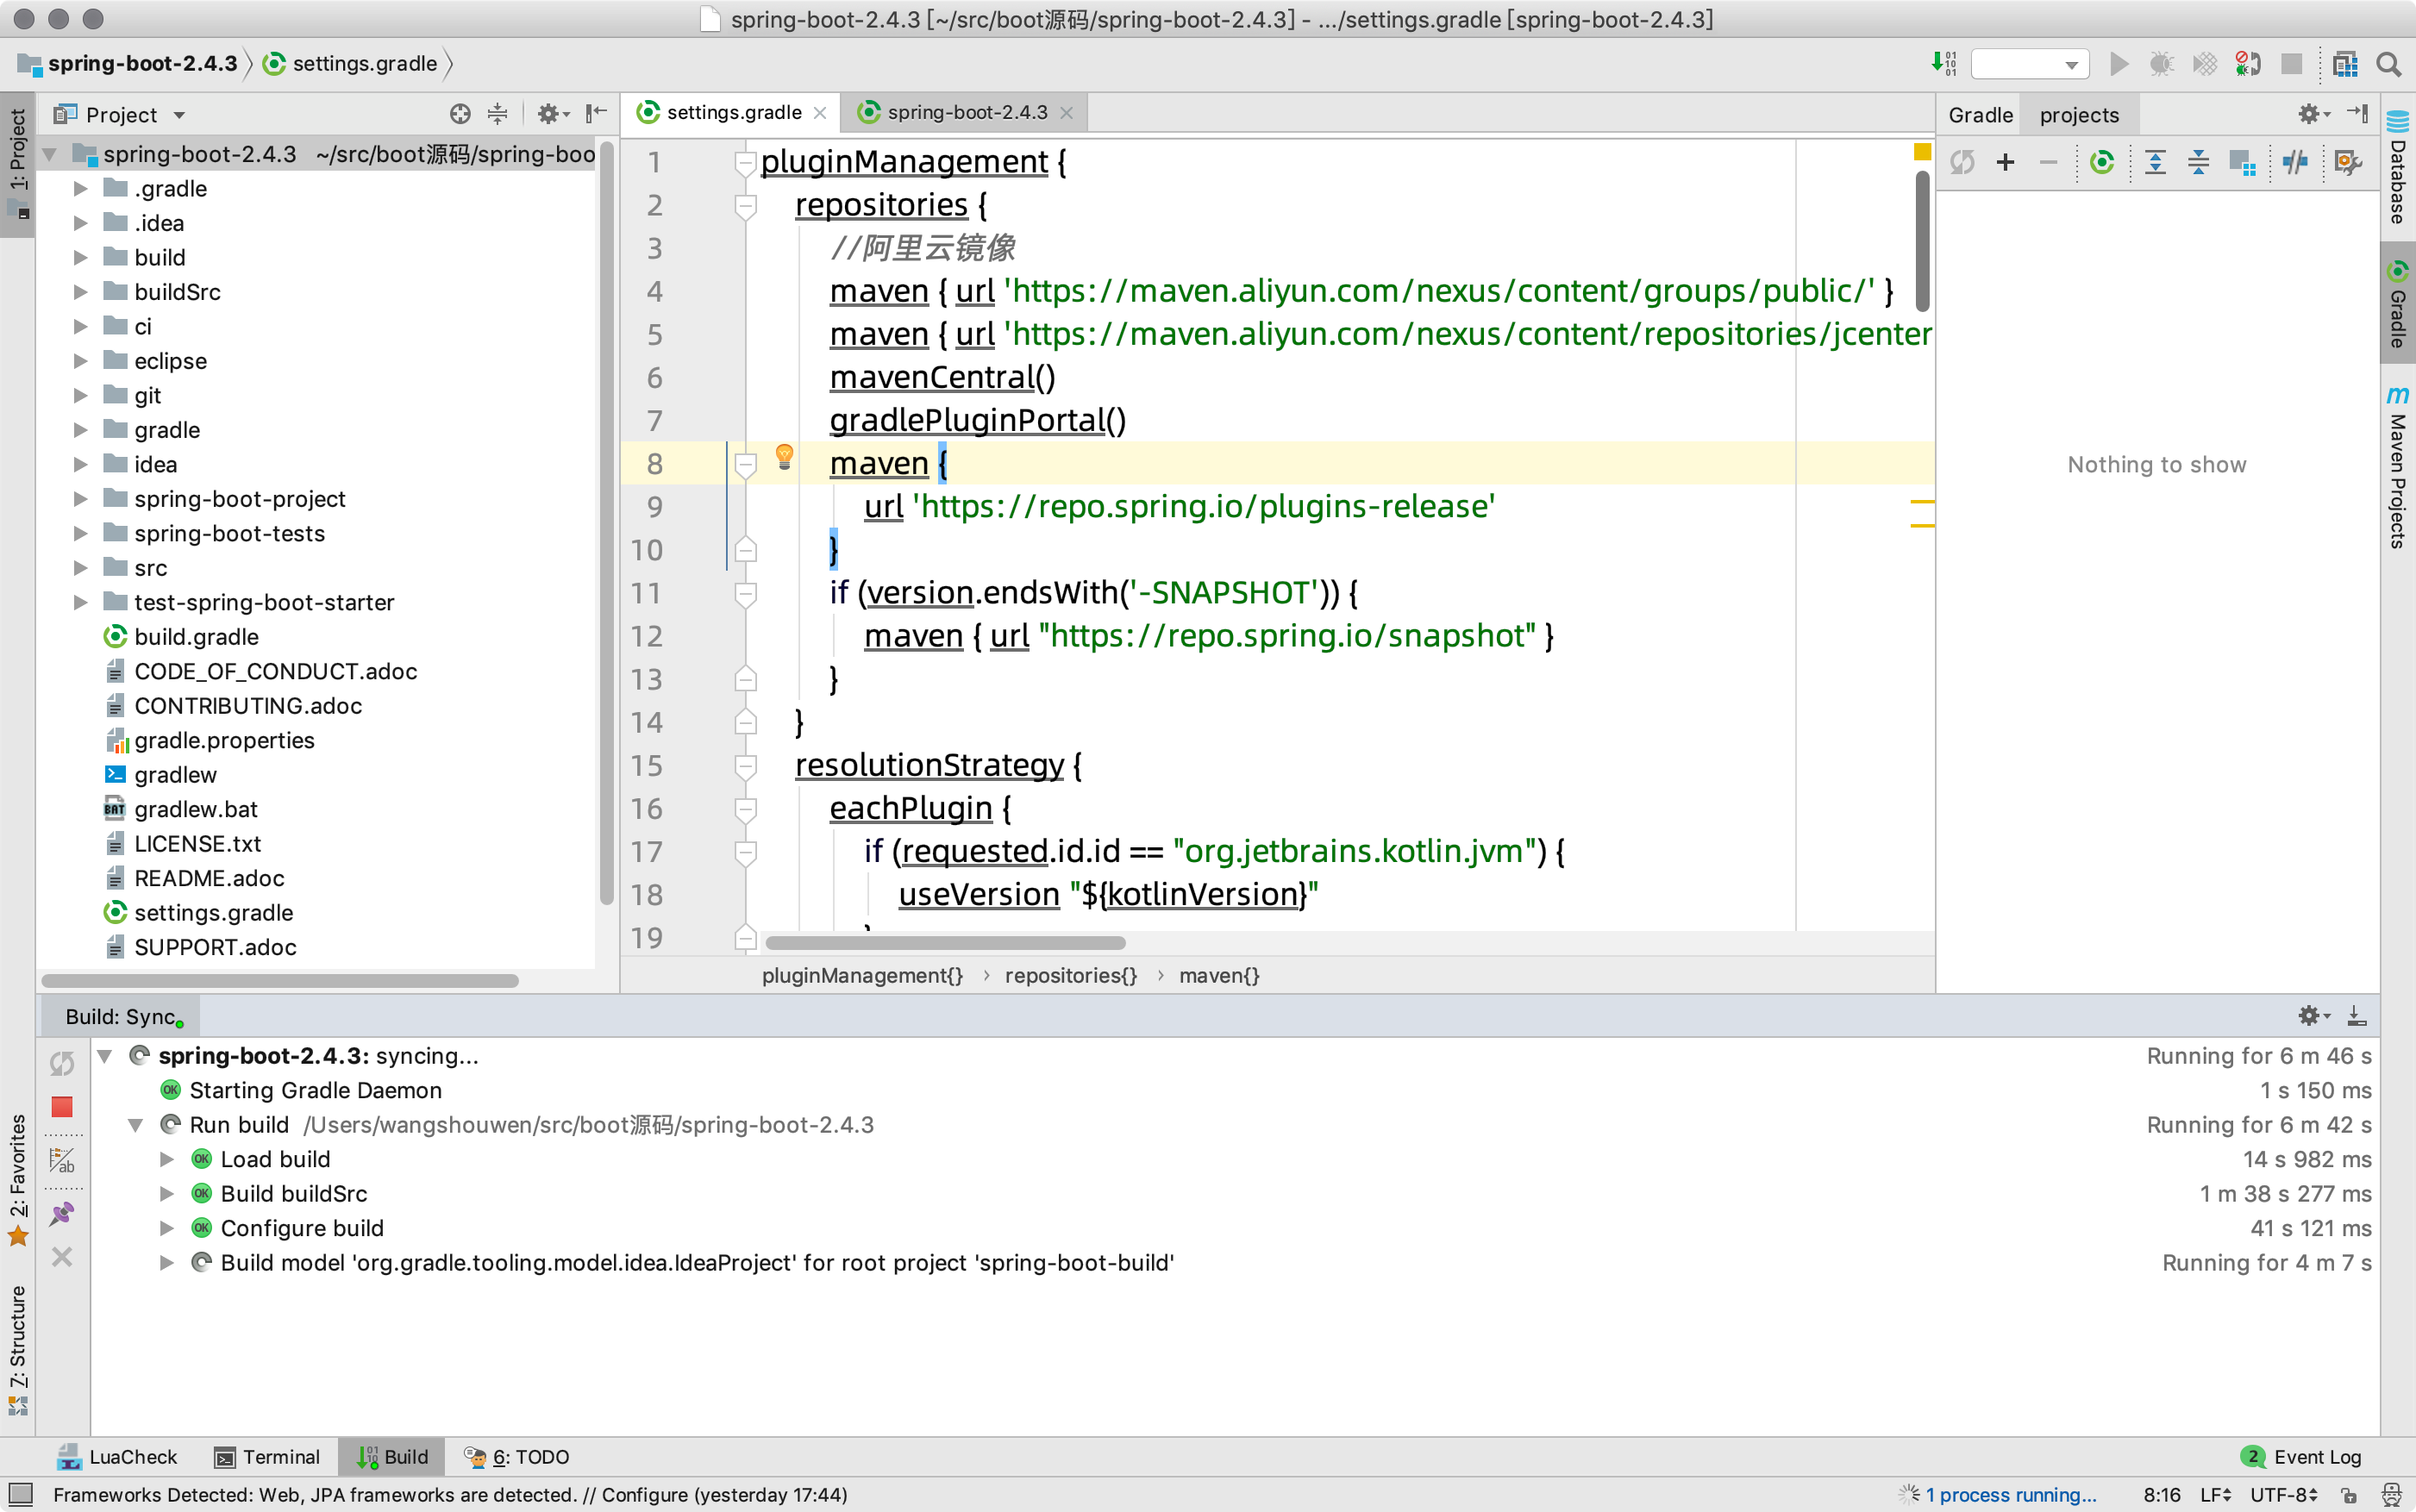
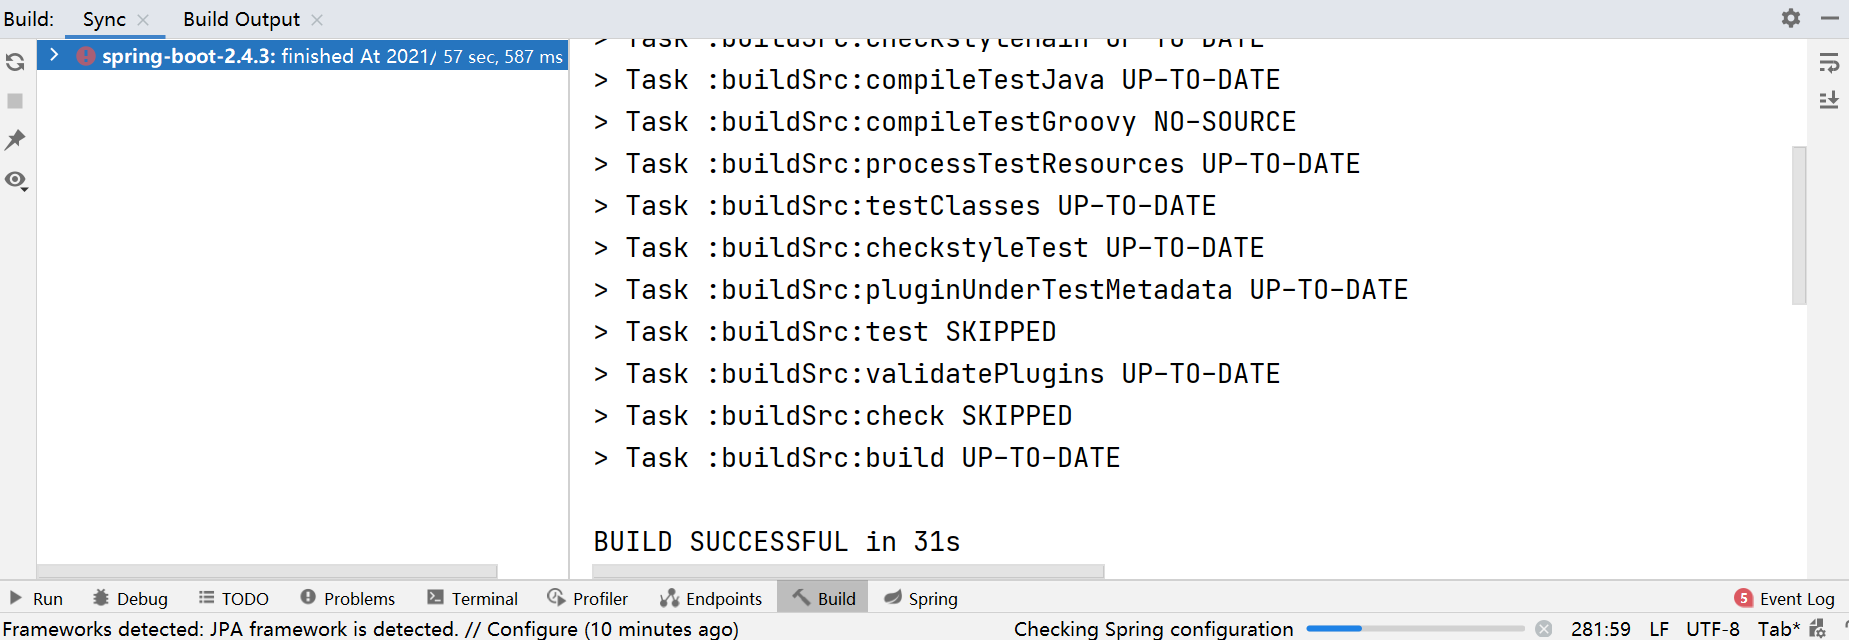
2、开始gradle构建
使用idea的build,不要用gradle的任务

看到下面的BUILE SUCESSFUL表示成功
1.3 Spring boot冒烟测试
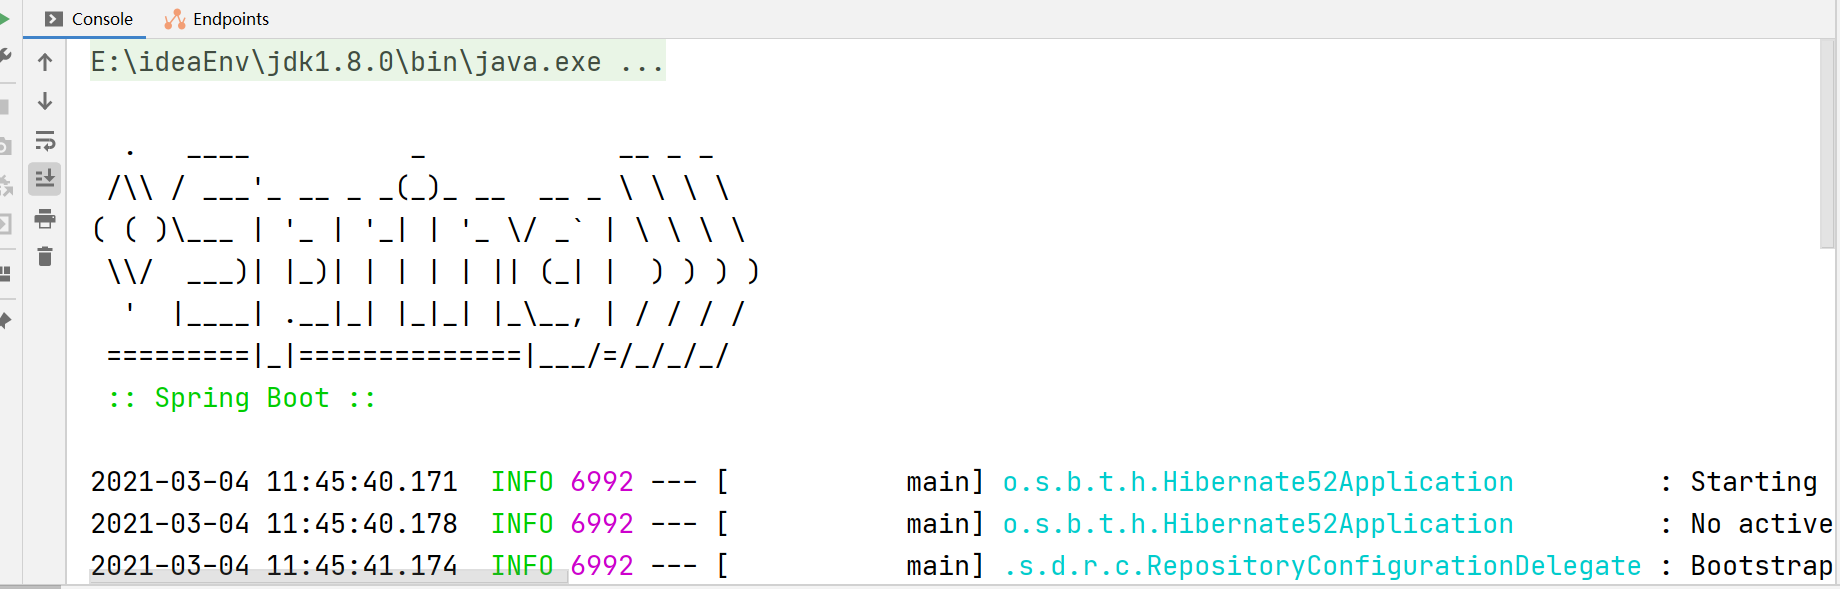
在springboot-boot-tests模块下很多冒烟测试的,会拖慢上面的编译,只留下了一个:
spring-boot-smoke-test-hibernate52工程来进行冒烟测试,打开Hibernate52Application.java文件,直接执行main方法启动springboot,成功!
org.springframework.boot.tests.hibernate52.Hibernate52Application
package org.springframework.boot.tests.hibernate52;

import org.springframework.boot.SpringApplication;
import org.springframework.boot.autoconfigure.SpringBootApplication;

@SpringBootApplication
public class Hibernate52Application {

	public static void main(String[] args) {
		SpringApplication.run(Hibernate52Application.class, args);
	}

}
执行run
console中出现我们熟悉的图标。
2 Spring boot源码深度剖析
引言
使用过SpringBoot开发项目的读者应该都能够感觉到
SpringBoot的开发完成后,只需要通过执行一个main方法就可以将整个web项目启动
无需将项目的jar文件放在tomcat下,然后启动tomcat,进而启动项目。
除此之外,好多依赖的jar包也无需我们再进行手动配置,减少了配置,
同时也减少了许多xml文件的配置,大大简化了我们的开发过程
那么
springboot在启动的时候到底做了哪些事情?
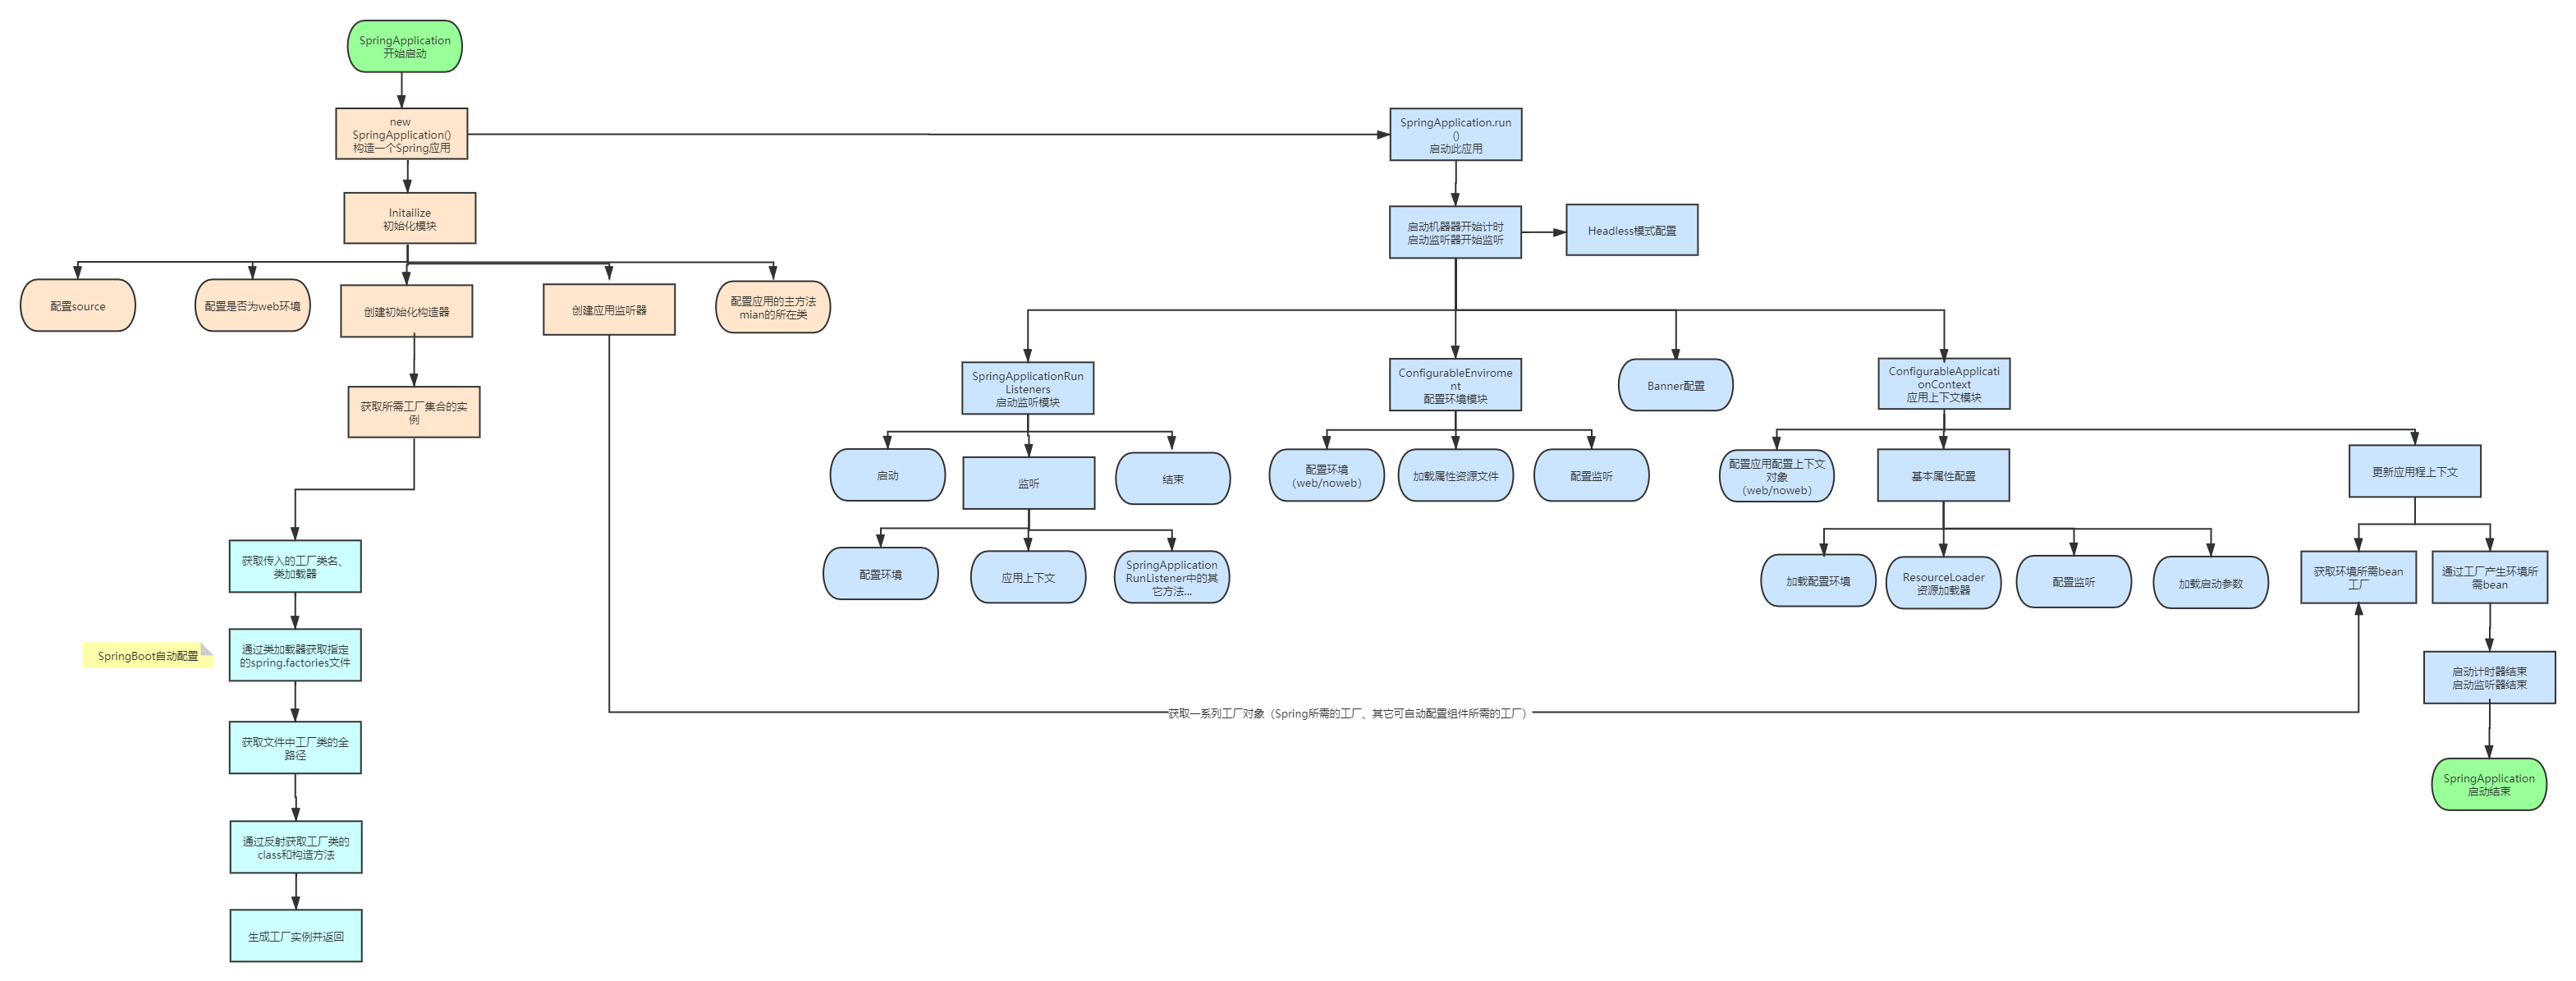
2.1 Spring boot启动流程剖析
第一步:new SpringApplication(primarySources)
第二步:run!
2.1.1 Spring boot启动流程剖析
Debug一下,追踪一下整个启动过程
main方法作为程序的入口,执行SpringApplication.run(),传入参数是启动类的class对象
1)Spring boot源码入口
@SpringBootApplication
public class Hibernate52Application {

	public static void main(String[] args)  {
		SpringApplication.run(Hibernate52Application.class, args);
	}

}
跟踪run方法;进入到
参数一可支持多个主要资源。
	public static ConfigurableApplicationContext run(Class<?> primarySource, String... args) {
		return run(new Class<?>[] { primarySource }, args);
	}
继续进入到run方法
	public static ConfigurableApplicationContext run(Class<?>[] primarySources, String[] args) {
		return new SpringApplication(primarySources).run(args);
	}
2)构造器(new)
//方法目标
//1、初始化资源加载器(classloader)
//2、处理primarySources
//3、web应用类型推断 (web、reactive、servlet)
//4、通过spring.factories加载配置类并初始化监听器 (SPI) 【重点】
//5、提取主类
	public SpringApplication(ResourceLoader resourceLoader, Class<?>... primarySources) {
		//null;资源加载器,用来获取 Resource 和 classLoader 以及加载资源
		this.resourceLoader = resourceLoader;
		Assert.notNull(primarySources, "PrimarySources must not be null");
		//存放主加载类;set中可同时创建多个Application,最后要解析这个来源上的注解
		this.primarySources = new LinkedHashSet<>(Arrays.asList(primarySources));
		//推断 web 类型:servlet 或 reactive
		this.webApplicationType = WebApplicationType.deduceFromClasspath();
//		0个,从spring.factories中找出Bootstrapper对应的属性
		this.bootstrappers = new ArrayList<>(getSpringFactoriesInstances(Bootstrapper.class));
//		7个,设置初始化器,从spring.factories中找出ApplicationContextInitializer对应的属性
		setInitializers((Collection) getSpringFactoriesInstances(ApplicationContextInitializer.class));
//		9个,设置监听器 从spring.factories中找出A