设为首页 加入收藏

TOP

Python实现对百度云的文件上传(一)
2017-10-21 06:06:55 】 浏览:208
Tags:Python 实现 百度 云的 文件 上传

环境准备

python3.6

PyCharm 2017.1.3

Windows环境

框架搭建

selenium3.6

安装方法:

pip install selenium

实现步骤:

一、步骤分析

1、选择“账号密码登录”

2、用户名、密码输入,登录

3、文件上传

注:本文主要介绍利用selenium包下的webdriver加载Firefox浏览器。

二、元素捕捉

利用火狐浏览器firebug插件复制控件的XPATH路径,注:Python3.6对应Firefox版本40.x,暂不支持最新版本50.x。

1、点击“账号密码登录”,获取其源文件

效果图如下:

点击右键,复制Xpath路径:/html/body/div[1]/div[3]/div[6]/div/div[6]/div[2]/a

登录按钮和文件上传同上,获取其相应的Xpath路径

代码:

1 #选择账号密码登录
2 driver.find_element_by_xpath('/html/body/div[1]/div[3]/div[6]/div/div[6]/div[2]/a').click()
3 # 登录  
4 driver.find_element_by_xpath('/html/body/div[1]/div[3]/div[6]/div/div[3]/form/p[5]/input').send_keys('username')
5 driver.find_element_by_xpath('/html/body/div[1]/div[3]/div[6]/div/div[3]/form/p[6]/input').send_keys('password')
6 driver.find_element_by_xpath('/html/body/div[1]/div[3]/div[6]/div/div[3]/form/p[9]/input').click()

2、登录成功后,点击文件上传,弹出文件对话框

“上传”的Xpath路径为://*[@id="h5Input0"]

代码:

1 #上传
2 driver.find_element_by_xpath('//*[@id="h5Input0"]').click()

点击上传按钮,弹出文件对话框

三、AutoIT编写脚本实现上传文件

webdriver无法对文件直接进行操作,所以需要借助AutoIT来实现文件上传

AutoIT下载地址:https://www.autoitscript.com/site

安装AutoIt之后,打开AutoIt Window Info(x64) 
这里写图片描述 
这里写图片描述

4、获取文件上传窗口的控件信息:

打开autoit工具之后,用鼠标将Finder Tool的图标拖到要识别的控件上

    1. 获取文本框的控件信息: 
      这里写图片描述
    2. 获取“打开”按钮的控件信息: 
      这里写图片描述

5、编写AutoIt脚本,实现文件上传

  1. 打开scite script editor
  2. 代码:
    ;ControlFocus("title", "text", controlID) Edit1=Edit instance 1
    ControlFocus("文件上传", "","Edit1")
    
    ;Wait 10 seconds for the Upload window to appear
    WinWait("[CLASS:#32770]", "",10)
    
    ;Set the File name thext on the Edit field
    ControlSetText("文件上传", "", "Edit1", "D:\test.txt")
    Sleep(2000)
    
    ;Click on the Open button
    ControlClick("文件上传", "", "Button1");

  3. 将文件保存upfile.au3 
这里写图片描述
  4. 使用compile script to exe将上述AutoIt脚本编译为exe文件供python脚本调用 
这里写图片描述

6、最后,使用Python脚本调用AutoIT脚本

1 #点击上传,打开上传文件窗口
2 driver.find_element_by_xpath('/html/body/div[1]/div[2]/div[1]/div[2]/div[2]/div[2]/a[1]/form/input').click()
3 
4 #使用autoit脚本自动上传文件
5 #需要导入python的os库文件:  import os
6 os.system("D:/upfile.exe")

完整代码如下:

 1 import os
 2 from selenium import webdriver
 3 import time
 4 class Connect():
 5     def __init__(self,UserName,PassWord,URL):
 6         self.UserName = UserName
 7         self.PassWord = PassWord
 8         self.URL = URL
 9     def connect(self):
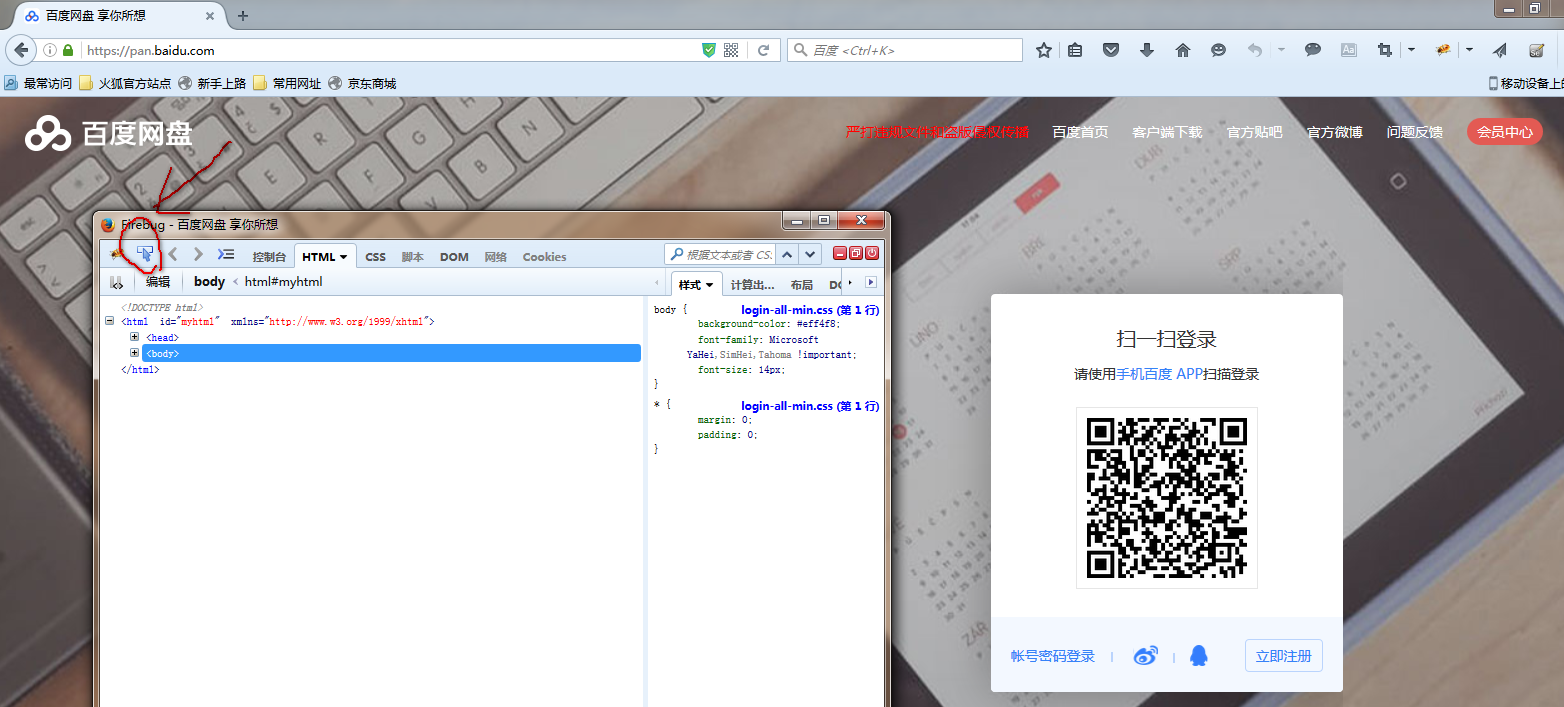
10         self.driver = webdriver.Firefox()
11         self.driver.get(self.URL)
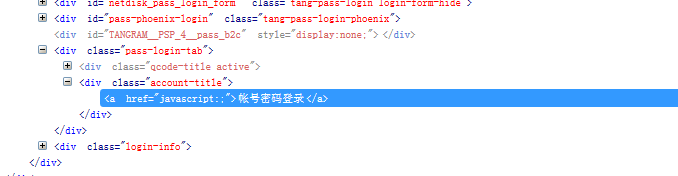
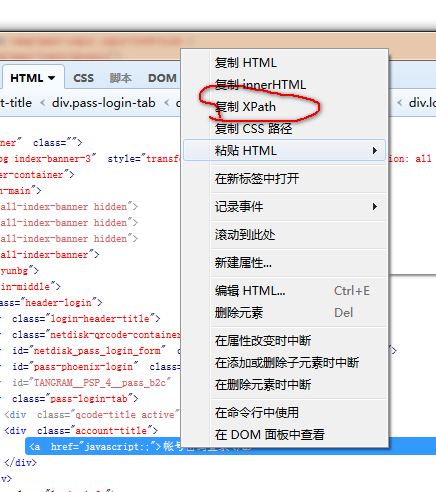
12         self.driver.find_element_by_xpath('/html/body/div[1]/div[3]/div[6]/div/div[6]/div[2]/a').click()
13         self.driver.find_element_by_xpath('/html/body/div[1]/div[3]/div[6]/div/div[3]/form/p[5]/input').send_keys(self.UserName)
14         self.driver.find_element_by_xpath('/html/body/div[1]/div[3]/div[6]/div/div[3]/form/p[6]/input').send_keys(self.PassWord)
15         self.driver.find_element_by_xpath('/html/body/div[1]/div[3]/div[6]/div/div[3]/form/p[9]/input').click()
16         #设置思考时间
17         time.sleep(30)
18         sreach_window = self.driver.current_window_handle  # 此行代码用来定位当前页面
19         self.driver.find_element_by_xpath('//*[@id="h5Input0"]').click()
20         os.system(r"C:\Users\zg\Desktop\upfile.exe&q
首页 上一页 1 2 下一页 尾页 1/2/2
】【打印繁体】【投稿】【收藏】 【推荐】【举报】【评论】 【关闭】 【返回顶部
上一篇Python 浅拷贝和深拷贝使用例子 下一篇购物车优化

最新文章

热门文章

Hot 文章

Python

C 语言

C++基础

大数据基础

linux编程基础

C/C++面试题目