iteLine(result);
var modelResult = rpc.HelloModel(5, "返回实体", DateTime.Now);
Console.WriteLine($"{modelResult.T1} {modelResult.T2} {modelResult.T3.ToLongDateString()}");
var modelResult1 = await rpc.HelloModelAsync(6, "返回Task实体", DateTime.Now);
Console.WriteLine($"{modelResult1.T1} {modelResult1.T2} {modelResult1.T3.ToLongDateString()}");
var mm = new DemoModel()
{
T1 = 7,
T2 = "传实体返回实体",
T3 = DateTime.Now,
Child = new ChildModel()
{
C1 = "子类1"
}
};
var model2 = rpc.HelloSendModel(mm);
Console.WriteLine($"{model2.T1} {model2.T2} {model2.T3.ToLongDateString()} {model2.Child.C1}");
var list = new List<DemoModel>();
var mm1 = new DemoModel()
{
T1 = 8,
T2 = "传List返回List",
T3 = DateTime.Now,
Child = new ChildModel()
{
C1 = "子类2"
}
};
var mm3 = new DemoModel()
{
T1 = 9,
T2 = "传List返回List",
T3 = DateTime.Now,
Child = new ChildModel()
{
C1 = "子类3"
}
};
list.Add(mm1);
list.Add(mm3);
var list3 = rpc.HelloSendModelList(list);
Console.WriteLine($"{list3[0].T1} {list3[0].T2} {list3[0].T3.ToLongDateString()} {list3[0].Child?.C1}");
var mm4 = new DemoModel()
{
T1 = 9,
T2 = "HelloSendModelParm",
T3 = DateTime.Now,
Child = new ChildModel()
{
C1 = "子类4"
}
};
var dd = rpc.HelloSendModelParm("HelloSendModelParm", mm4);
Console.WriteLine($"{dd.T1} {dd.T2} {dd.T3.ToLongDateString()} {dd.Child.C1}");
//异常调用
await rpc.TestBusinessExceptionInterceptor();
}
catch (BusinessException e)
{
Console.WriteLine($"CzarCode:{e.CzarCode} CzarMessage:{e.CzarMessage}");
}
catch (Exception ex)
{
Console.WriteLine(ex);
}
Console.ReadLine();
}
}
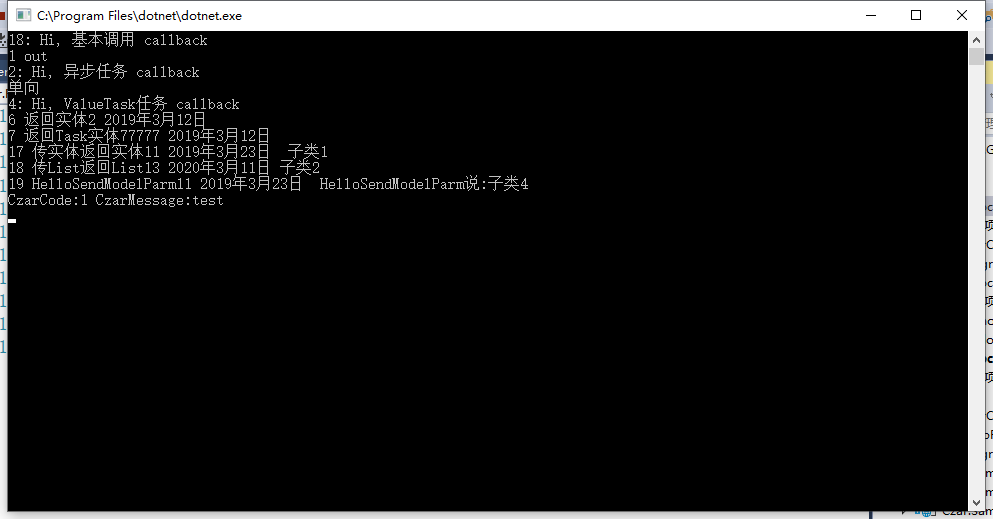
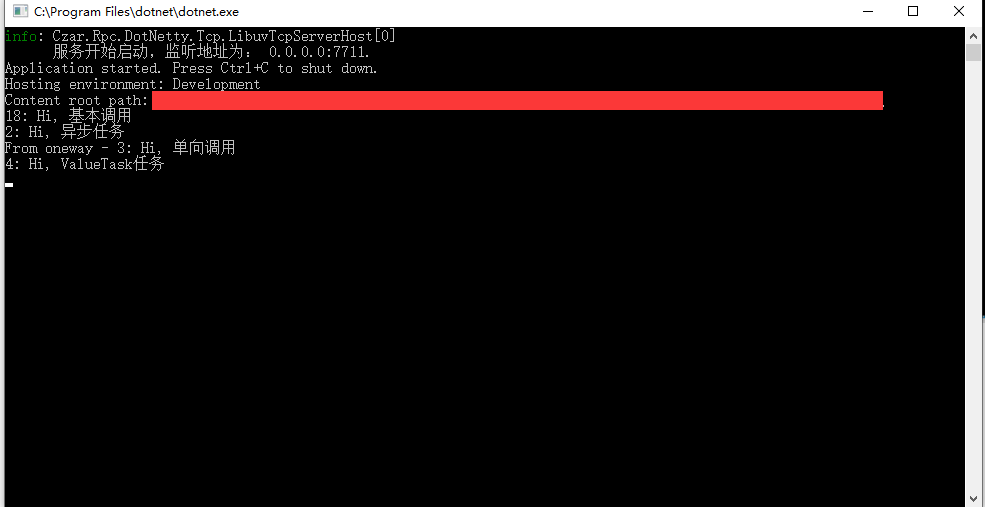
现在整个RPC调用搭建完毕,然后分别启动服务器端和客户端,就可以看到屏幕输出内容如下。
客户端输出:
服务器端输出:
至此整个CzarRpc的基本使用已经介绍完毕,感兴趣的朋友可以自行测试。
三、Ocelot增加RPC支持
有了CzarRpc的通讯框架后,现在在Ocelot上实现Rpc功能简直易如反掌,现在开始添加我们的Rpc中间件,也让我们扩展的网关灵活起来。
还记得我介绍网关篇时添加中间件的步骤吗?如果不记得的可以先回去回顾下。
首先如何让网关知道这个后端调用是http还是Rpc呢?这时应该会想到Ocelot路由配置里的DownstreamScheme,可以在这里判断我们定义的是http还是rpc即可。同时我们希望之前定义的所有中间件都生效,最后一步请求时如果配置下端路由rpc,使用rpc调用,否则使用http调用,这样可以重复利用之前所有的中间件功能,减少重复开发。
在之前的开发的自定义限流和自定义授权中间件开发中,我们知道开发完的中间件放到哪里使用,这里就不介绍原理了,直接添加到BuildCzarOcelotPipeline里如下代码。
public static OcelotRequestDelegate BuildCzarOcelotPipeline(this IOcelotPipelineBuilder builder,
            OcelotPipelineConfiguration pipelineConfiguration)
        {

            // 注册一个全局异常
            builder.UseExceptionHandlerMiddleware();

            // 如果请求是websocket使用单独的管道
            builder.MapWhen(context => context.HttpContext.WebSockets.IsWebSocketRequest,
                app =>
                {
                    app.UseDownstreamRouteFinderMiddleware();
                    app.UseDownstreamRequestInitialiser();
                    app.UseLoadBalancingMiddleware();
                    app.UseDownstreamUrlCreatorMiddleware();
                    app.UseWebSocketsProxyMiddleware();
                });

            // 添加自定义的错误管道
            builder.UseIfNotNull(pipelineConfiguration.PreErrorResponderMiddleware);

            //使用自定义的输出管道
            builder.UseCzarResponderMiddleware();

            // 下游路由匹配管道
            builder.UseDownstreamRouteFinderMiddleware();

            //增加自定义扩展管道
            if (pipelineConfiguration.MapWhenOcelotPipeline != null)
            {
                foreach (var pipeline in pipelineConfiguration.MapWhenOcelotPipeline)
                {
                    builder.MapWhen(pipeline);
                }
            }

            // 使用Http头部转换管道
            builder.UseHttpHeader