快速入门介绍了使用IdentityServer保护API的最基本方案。 我们将定义一个API和一个想要访问它的客户端。 客户端将通过提供ClientCredentials在IdentityServer请求访问令牌,ClientCredentials充当客户端和IdentityServer都知道的秘密,并且它将使用该令牌来访问API。
9.1设置ASP.NET核心应用程序
首先为应用程序创建一个目录 - 然后使用我们的模板创建一个包含基本IdentityServer设置的ASP.NET Core应用程序,例如:
md quickstart
cd quickstart

md src
cd src

dotnet new is4empty -n IdentityServer
这将创建以下文件:
- IdentityServer.csproj- 项目文件和Properties\launchSettings.json文件
- Program.cs和Startup.cs- 主要的应用程序入口点
- Config.cs - IdentityServer资源和客户端配置文件
您现在可以使用自己喜欢的文本编辑器来编辑或查看文件。如果您希望获得Visual Studio支持,可以添加如下解决方案文件:
cd ..
dotnet new sln -n Quickstart
然后让它添加你的IdentityServer项目(记住这个命令,因为我们将在下面创建其他项目):
dotnet sln add .\src\IdentityServer\IdentityServer.csproj注意
此模板中使用的协议是http,当在Kestrel上运行时,端口设置为5000或IISExpress上的随机端口。您可以在Properties\launchSettings.json文件中更改它。但是,所有快速入门指令都假定您使用Kestrel上的默认端口以及http协议,该协议足以进行本地开发。
9.2 定义API资源
API是您要保护的系统中的资源。
资源定义可以通过多种方式加载,模板使用“代码作为配置”appproach。在Config.cs文件中,您可以找到一个名为GetApisAPI 的方法,如下所示:
public static IEnumerable<ApiResource> GetApis()
{
    return new List<ApiResource>
    {
        new ApiResource("api1", "My API")
    };
}
9.3 定义客户端
下一步是定义可以访问此API的客户端。
对于此方案,客户端将不具有交互式用户,并将使用IdentityServer的所谓客户端密钥进行身份验证。将以下代码添加到Config.cs文件中:
public static IEnumerable<Client> GetClients()
{
    return new List<Client>
    {
        new Client
        {
            ClientId = "client",

            // no interactive user, use the clientid/secret for authentication
            AllowedGrantTypes = GrantTypes.ClientCredentials,

            // secret for authentication
            ClientSecrets =
            {
                new Secret("secret".Sha256())
            },

            // scopes that client has access to
            AllowedScopes = { "api1" }
        }
    };
}
9.4 配置IdentityServer
在Startup.cs加载资源和客户端定义 - 模板已经为您执行此操作:
public void ConfigureServices(IServiceCollection services)
{
var builder = services.AddIdentityServer()
.AddInMemoryIdentityResources(Config.GetIdentityResources())
.AddInMemoryApiResources(Config.GetApis())
.AddInMemoryClients(Config.GetClients());
// rest omitted
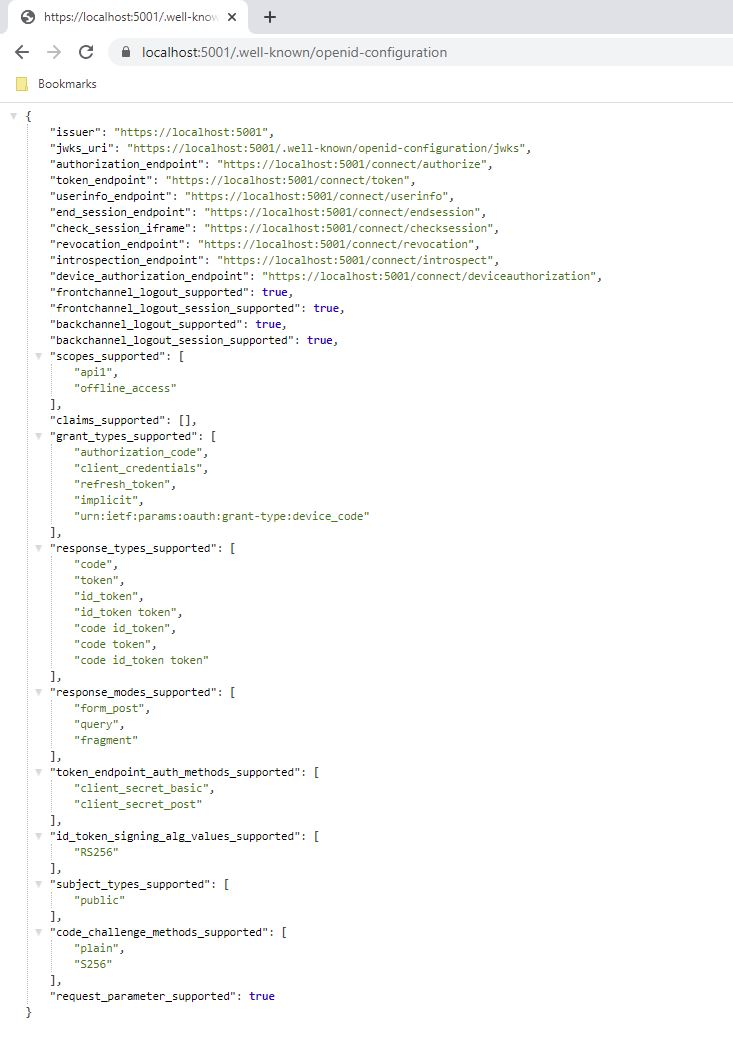
}就是这样 - 如果您运行服务器并浏览浏览器 http://localhost:5000/.well-known/openid-configuration,您应该会看到所谓的发现文档。客户端和API将使用它来下载必要的配置数据。
首次启动时,IdentityServer将为您创建一个开发人员签名密钥,它是一个名为的文件tempkey.rsa。您不必将该文件检入源代码管理中,如果该文件不存在,将重新创建该文件。
9.5 添加API
接下来,为您的解决方案添加API。
您可以使用Visual Studio中的ASP.NET Core Web API(或空)模板,也可以使用.NET CLI来创建API项目。从src文件夹中运行以下命令:
dotnet new web -n Api然后通过运行以下命令将其添加到解决方案中:
cd ..
dotnet sln add .\src\Api\Api.csproj将API应用程序配置为http://localhost:5001仅运行。您可以通过编辑Properties文件夹中的launchSettings.json文件来完成此操作。将应用程序URL设置更改为:
"applicationUrl": "http://localhost:5001"9.6 控制器
在API项目中添加一个新文件夹Controllers和一个新控制器IdentityController:
[Route("identity")]
[Authorize]
public class IdentityController : ControllerBase
{
    [HttpGet]
    public IActionResult Get()
    {
        return new JsonResult(from c in User.Claims select new { c.Type, c.Value });
    }
}
这个控制器将在后面被用于测试授权需求,同时通过API的眼睛(浏览工具)来可视化身份信息。
9.7 配置
最后一步是将身份验证服务添加到DI和身份验证中间件到管道。这些将:
- 验证输入的令牌以确保它来自可信任的发布者(IdentityServer)
- 验证令牌是否可用于该 api(也就是 Scope)。
将Startup更新为如下所示:
public class Startup
{
    public void ConfigureServices(IServiceCollection services)
    {
        services.AddMvcCore()
            .AddAuthorization()
            .AddJsonFormatters();

        s